Status: Returned to owner still malfunctioning on 3/24/2023. Diagnostics started on 12/19/2022
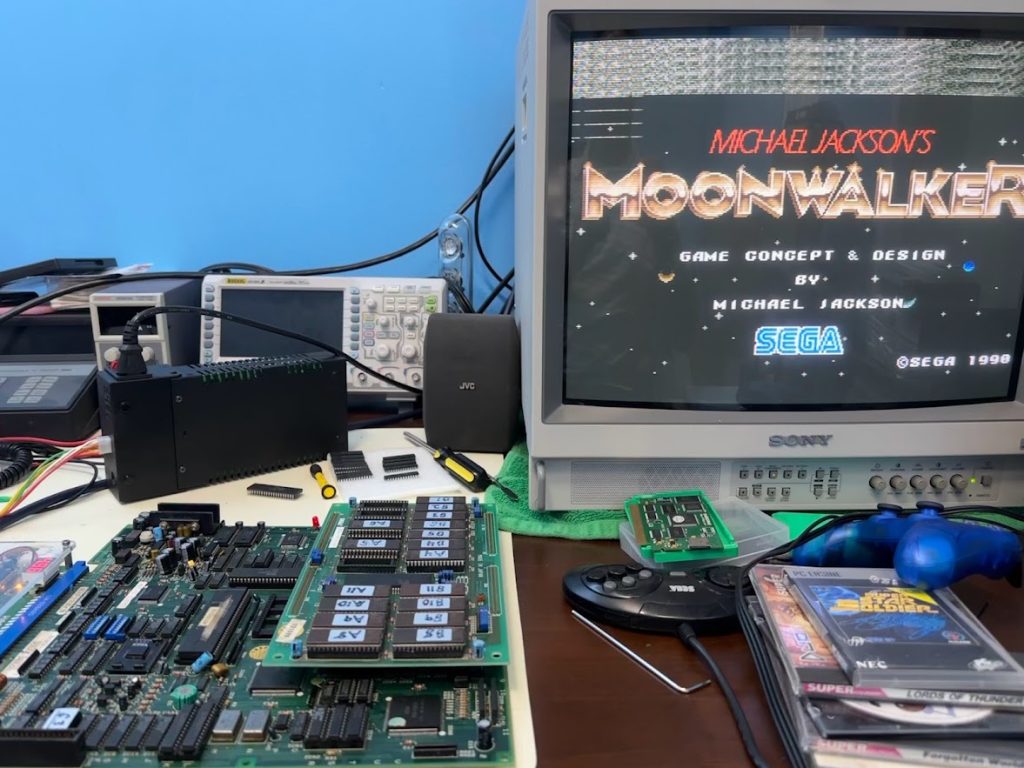
In for repair is a Sega System 18 board, home to a handful of Sega classics such as Shadow Dancer, Michael Jackson’s Moonwalker and Alien Storm. System 18 is a enhanced version of the System 16 board, but while System 16 has schematics available, System 18 does not.
The board would just hang on a black screen at power up – traditionally the sign of a suicided CPU on a System 18 board.
System 18 used the infamous Hitachi FD1089 or FS1094 CPU, an enhanced Motorola 68000 CPU with a decryption mechanism added. Game code is stored encrypted in sockets A5 and A6 on the ROM board. If the battery inside the Hitachi CPU dies then decryption key inside the CPU is lost and the board will crash at boot up when it tries to execute the encrypted code. System 18 also used an Intel 8751 memory controller for additional copy protection.
A suicided System 18 board can be revived by either:
A) Open the Hitachi CPU and replace the internal watch battery. Then use an Audino to rewrite the decryption key back into the Hitachi CPU
B) Replace the two encrypted EPROMs with decrypted code, remove the Intel 8751 MCU and swap the Hitachi CPU out for a standard Motorola 68000.
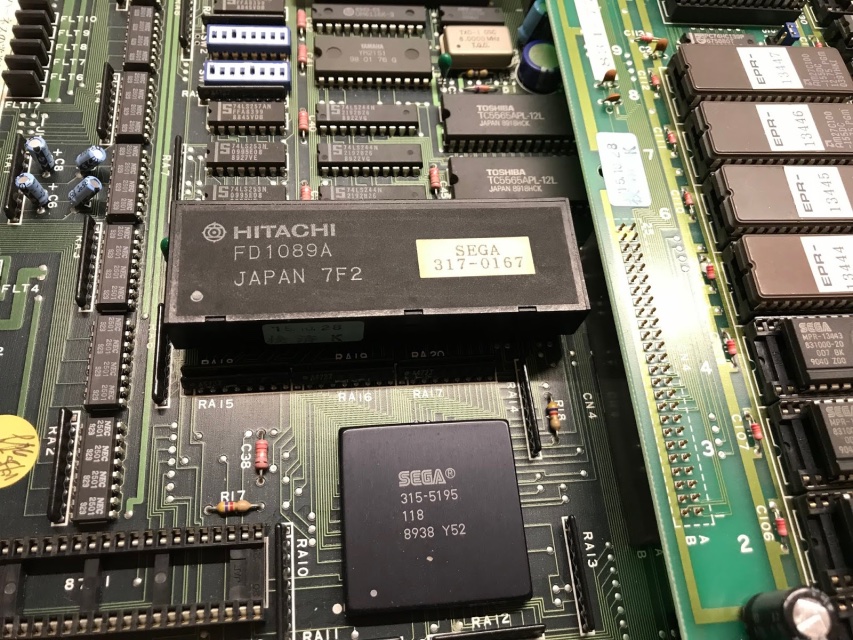
This board has a Sega factory label of Shadow Dancer, but it appeared to have been desuicided already – the EPROMs on the B board weren’t the Sega originals, the Intel MCU was missing, and the CPU had been swapped for a standard 68000.
I personally have a functioning System 18 board, so I swapped the 68000 CPU and ROM board over to my board – and it still hangs with a black screen at power up with my board..
I pulled the EPROMs from the ROM board and compared them against Apocalypse’s Shadow Dancer No MPU romset. Three EPROM’s didn’t match, so I reprogrammed them, then reinstalled everything back into the ROM board.
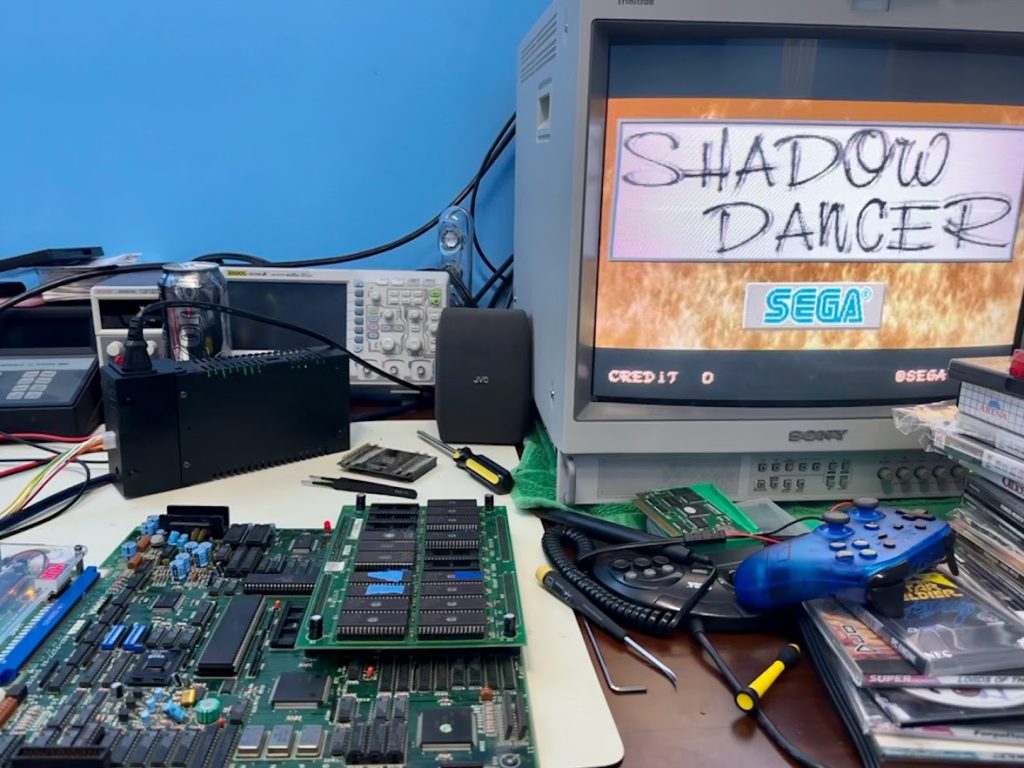
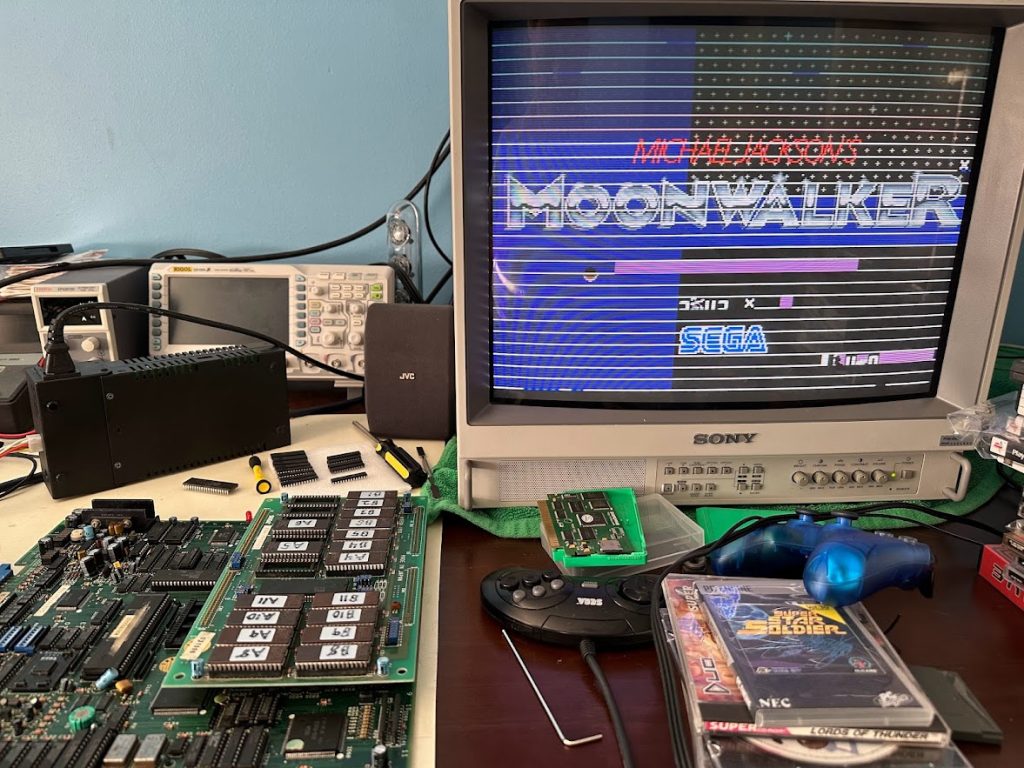
Now my functioning System 18 board booted the game up properly:
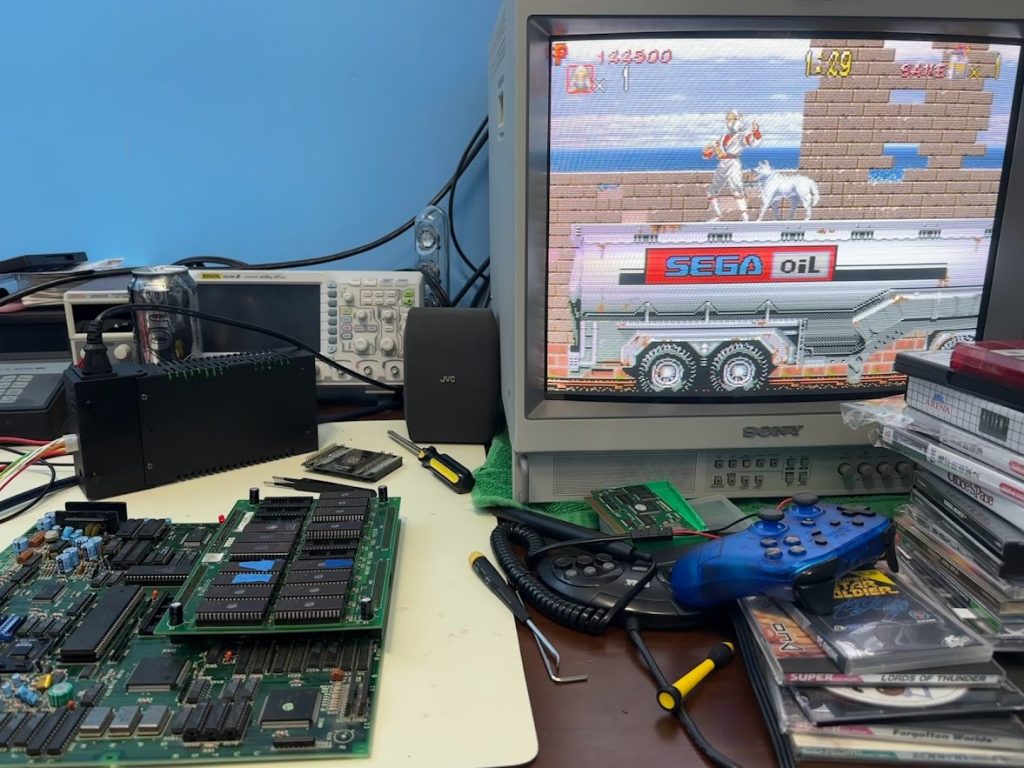
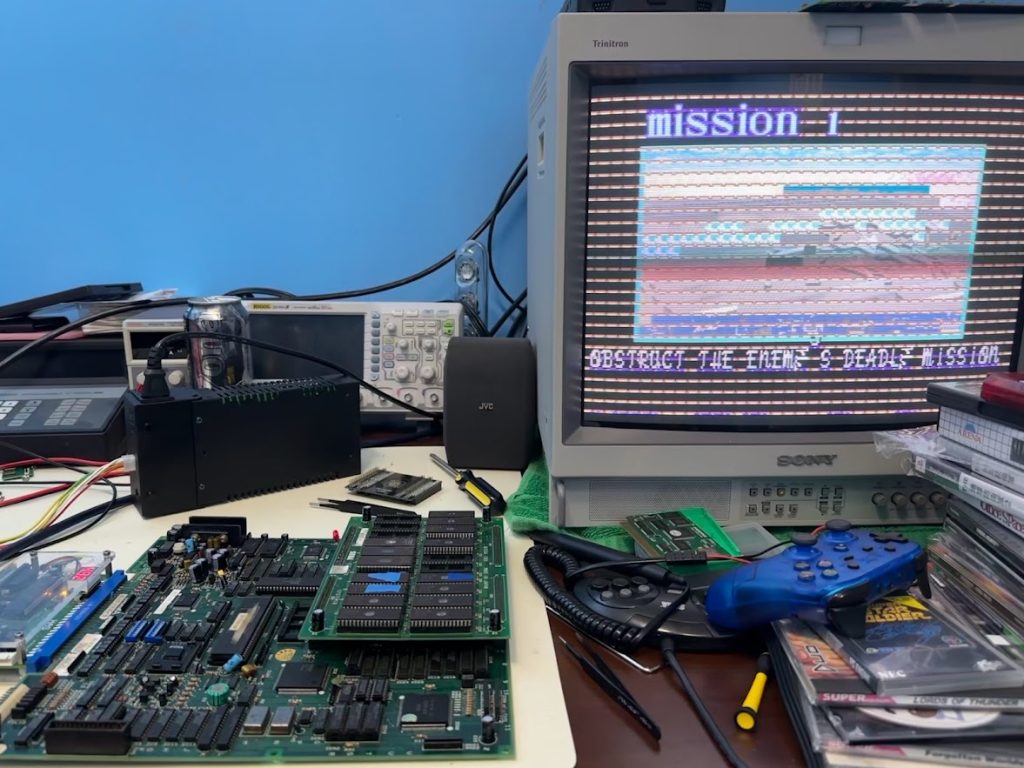
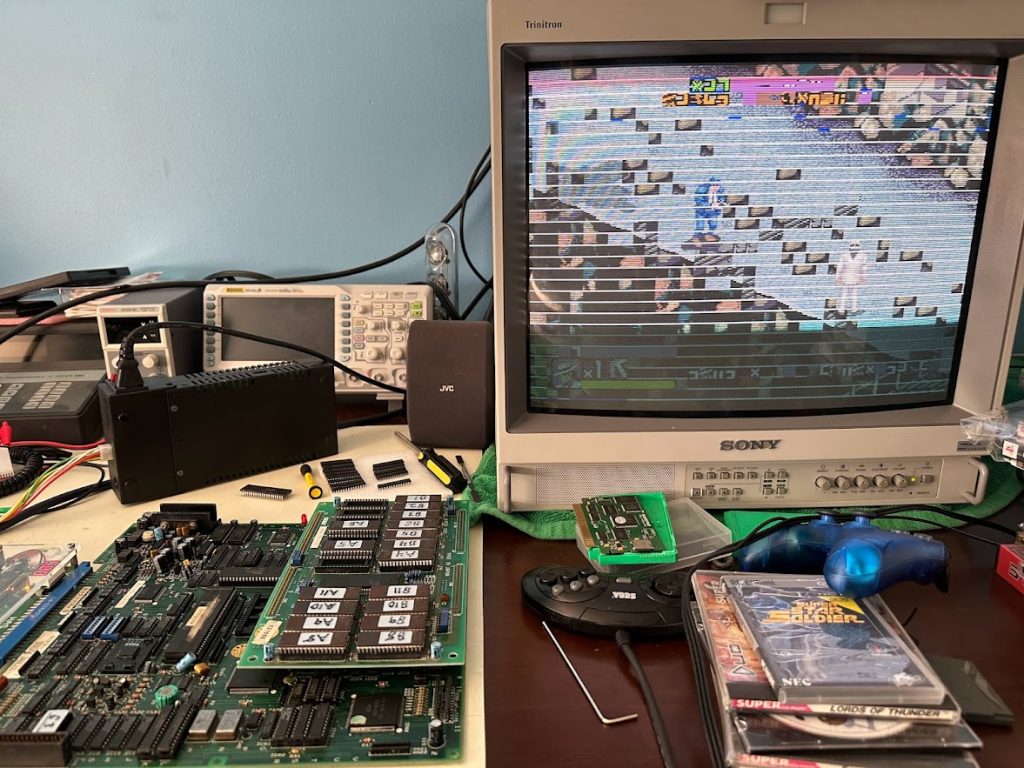
Moving the 68000 CPU and ROM board back over to the project System 18 gave me a booting game but with corrupted background tiles and sprites. The audio is working properly at least.
The ROM board is good since the game plays perfectly when I install it in my System 18 board, so the problems are all in the main board.
When I researched other System 18 repair logs, someone mentioned that Michael Jackson’s Moonwalker has a more thorough Self-Diagnostic than Shadow Dancer, so I programmed Apocalypse’s Moonwalker No MPU romset to another set of EPROMs to do a comparison.
The Moonwalker diagnostic on my functional System 18 board looks like this:
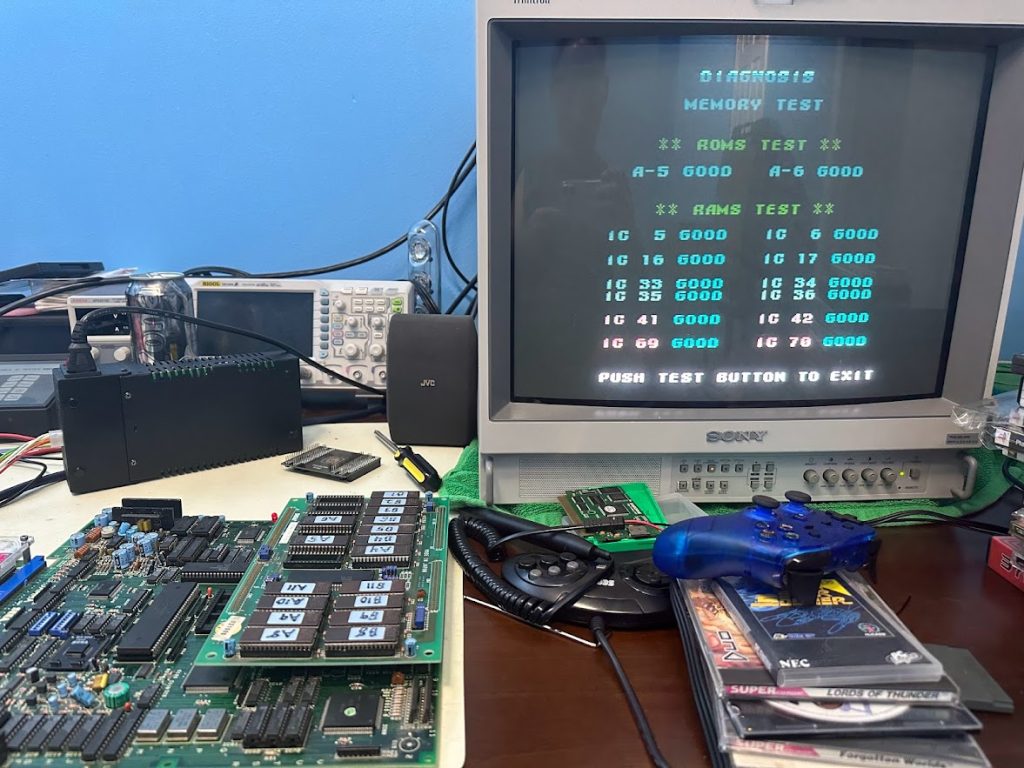
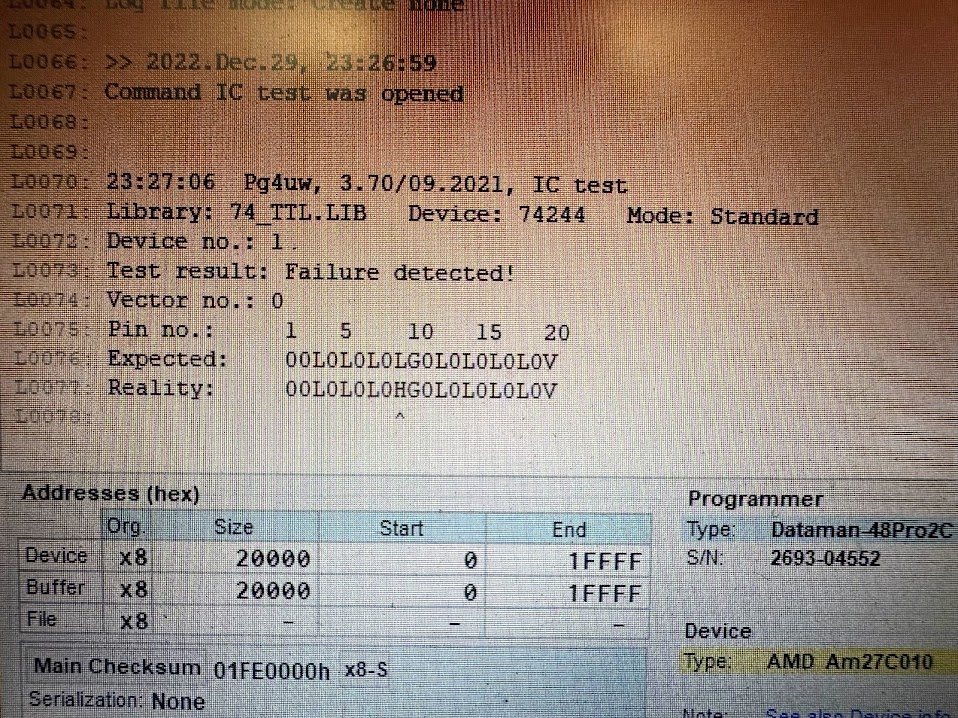
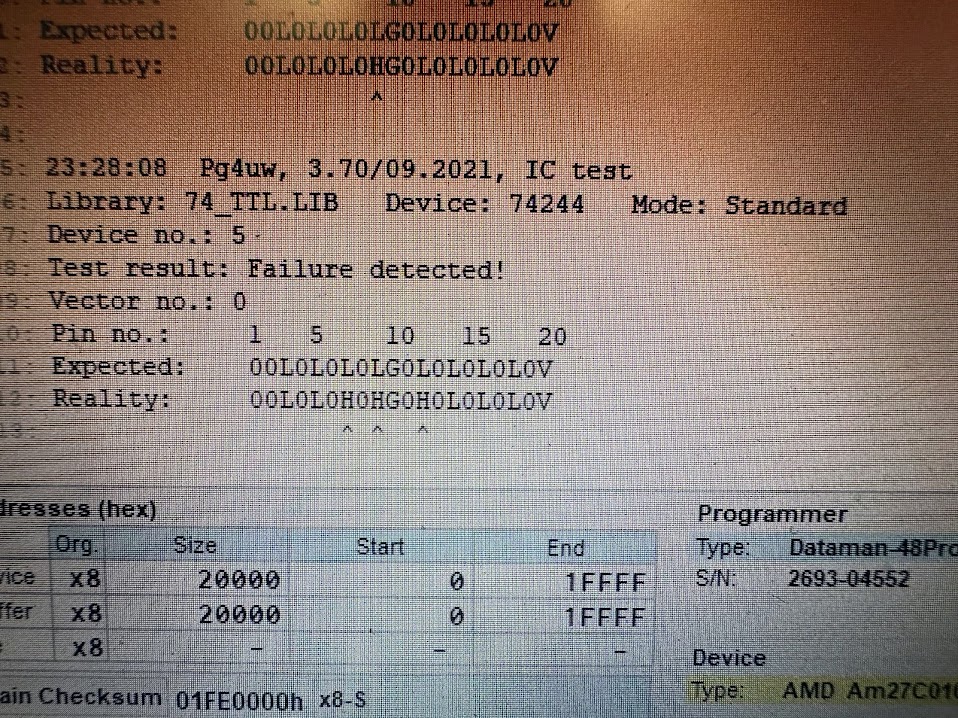
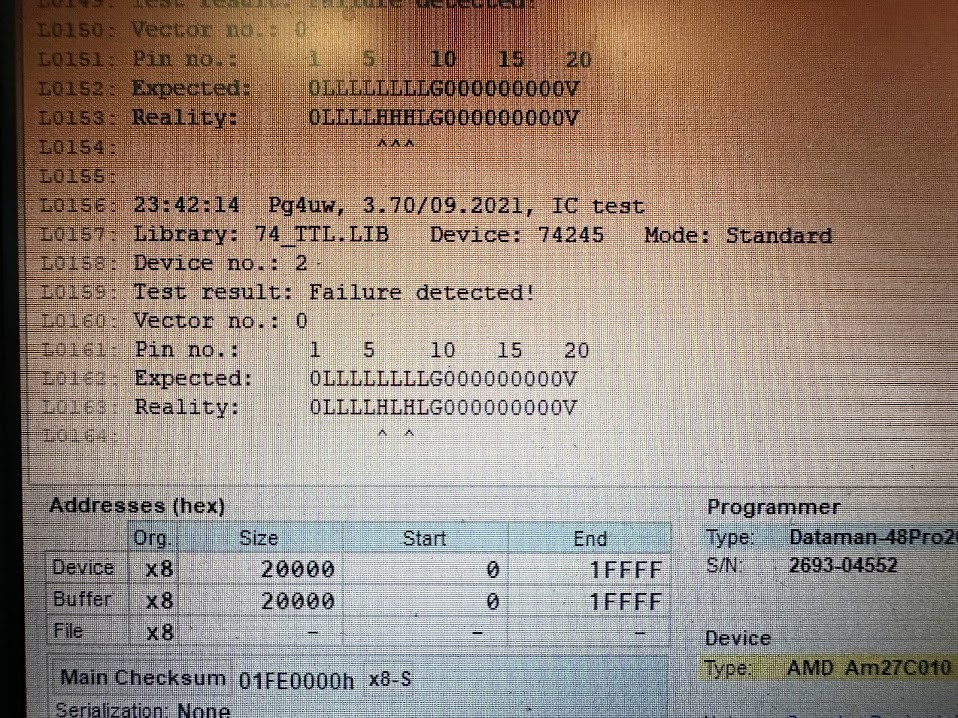
While the diagnostic on the project System 18 board looks like this:
IC33 and 35 are flunking, and the diagnostics hang when checking IC5, so that gives me some good places to start looking.
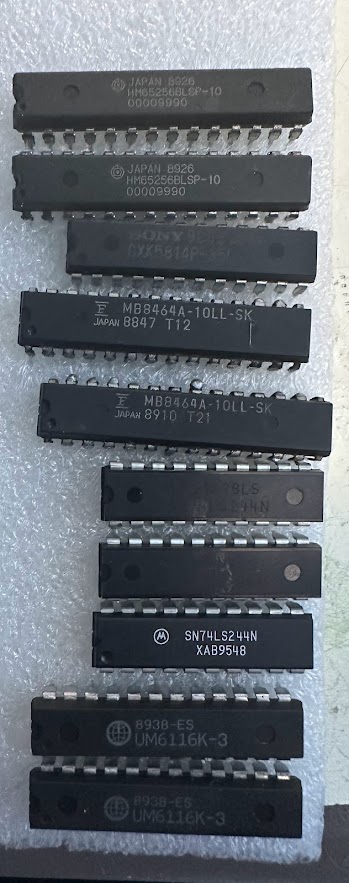
IC33 is paired with IC34 – they’re a pair of 6116 SRAM chips located under the ROM board in the upper-middle of the A board used for background tiles.

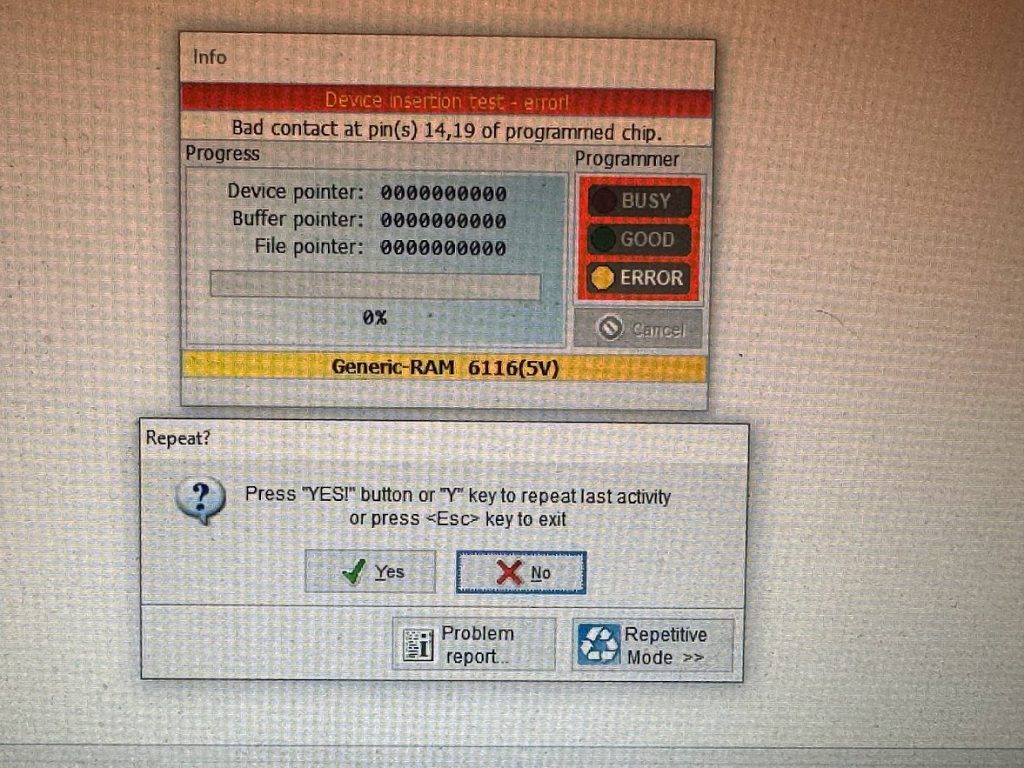
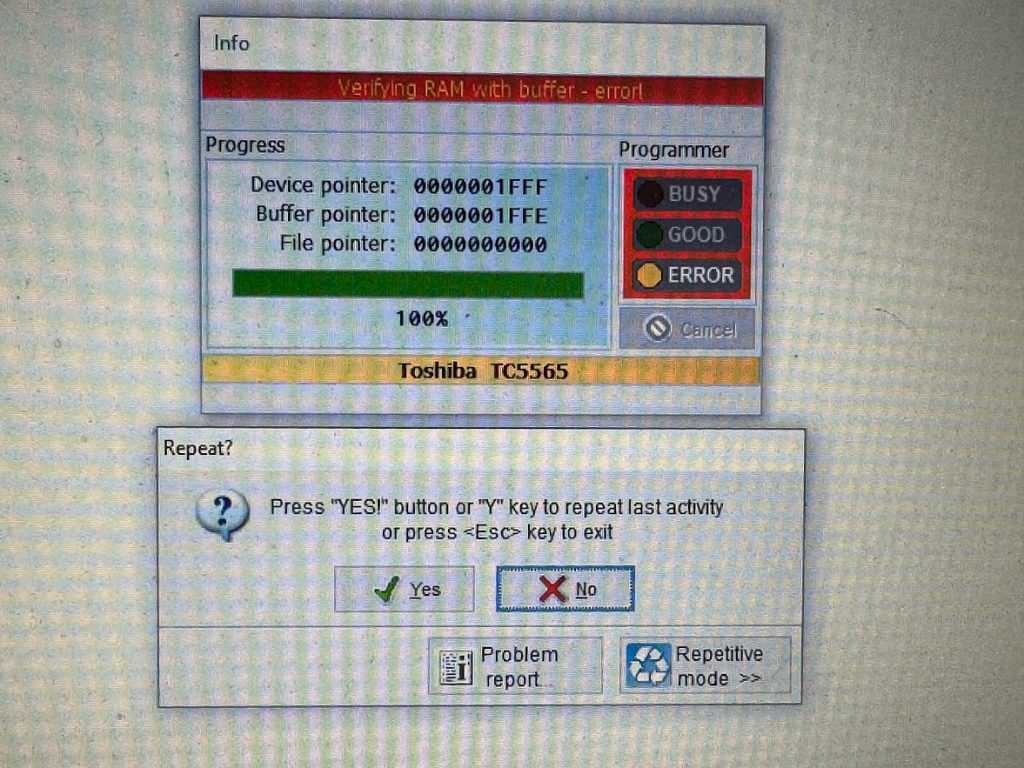
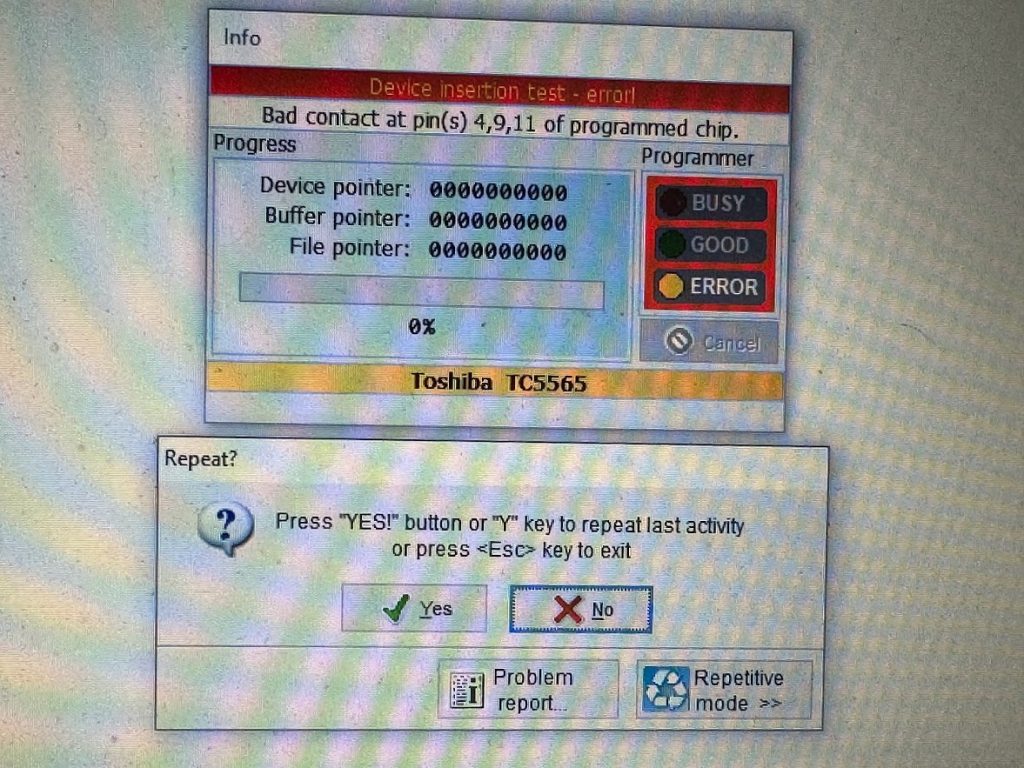
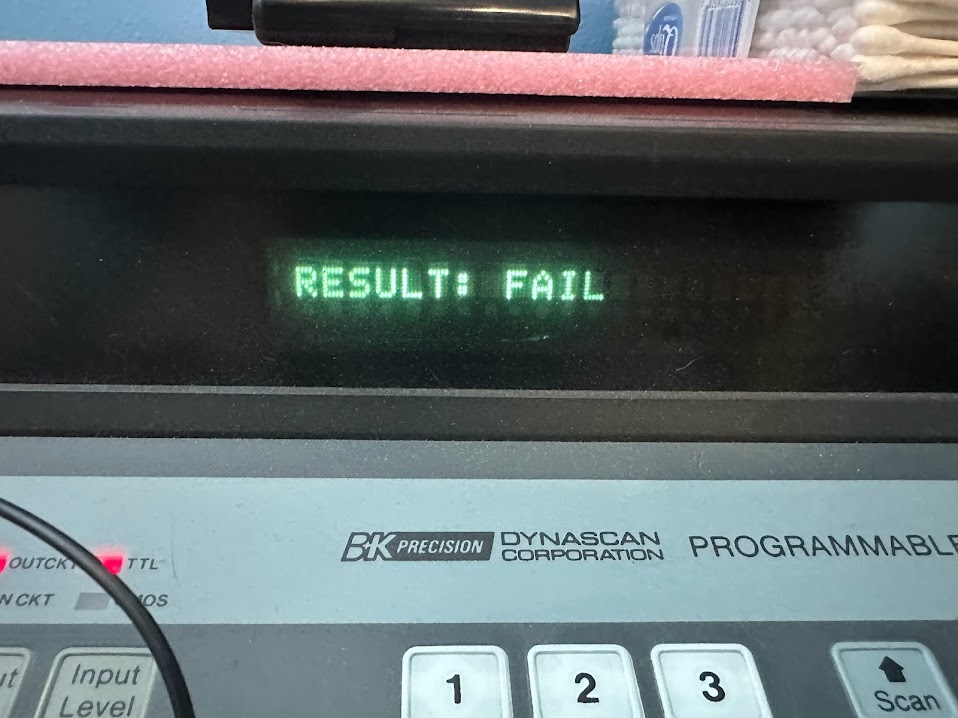
They were already socketed, so I pulled them from the sockets and tested them. One tested bad on the programmer.
I didn’t want to mix brands, so I installed two matching 6116 SRAM chips in their place.
IC35 is paired with IC36 – they’re a pair of 65256 SRAM chips adjacent to the 6116 chips I just replaced that are also used for rendering background tiles. They’re soldered to the board, so I carefully desoldered and tested them.
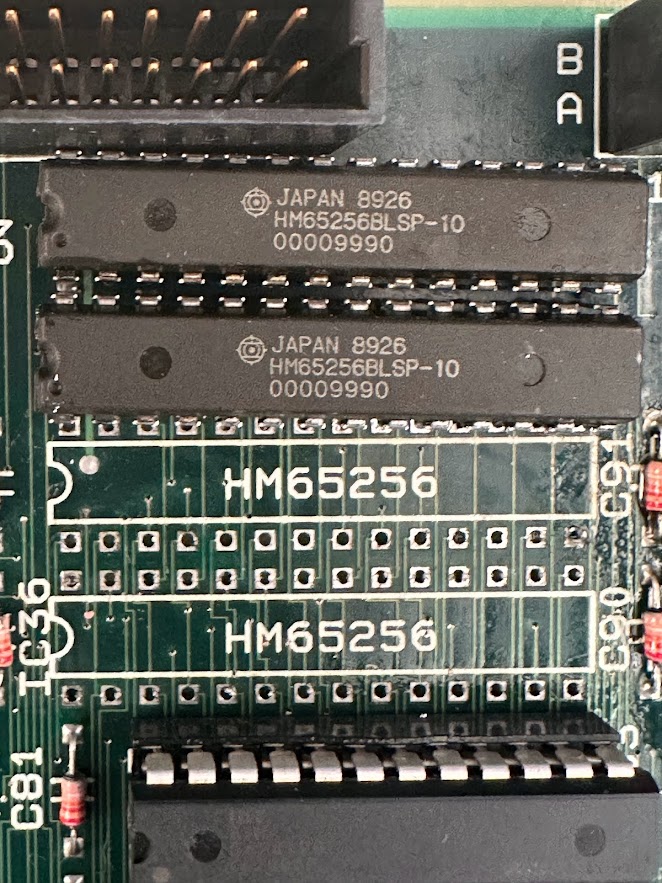
I forgot to take a picture of the test results, but TL;DR – they both failed and I installed sockets and replaced both of them with new ones.
IC5 is paired with IC 6 – they’re a pair of 55256 SRAM chips used as CPU work RAM in the lower-right corner of the board. Unfortunately they were both soldered, not socketed, so I carefully desoldered them.
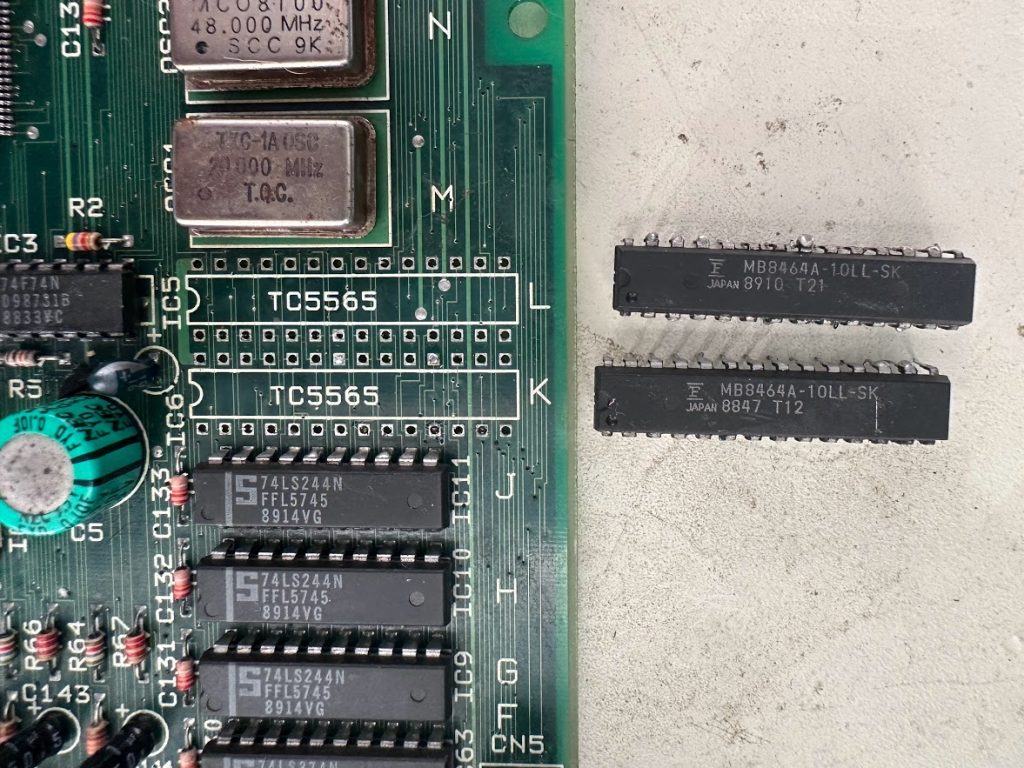
Both of them tested Bad in my tester.
I installed sockets and replacement RAM chips – forgot to take a picture though!
Glancing around the board, I noticed two more socketed RAM chips in the upper-right corner – since we’re already checking RAM, why not check these two real quick too right?
IC16 and 17 are 2018 series RAM used for sprite rendering. Naturally one of the two tested Bad as well – is there any good RAM in this board?!
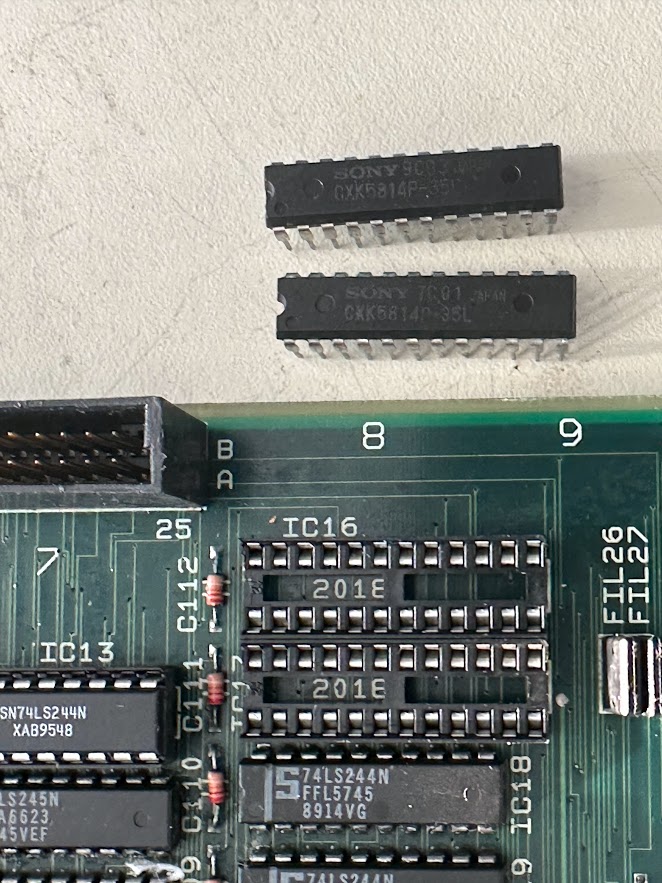
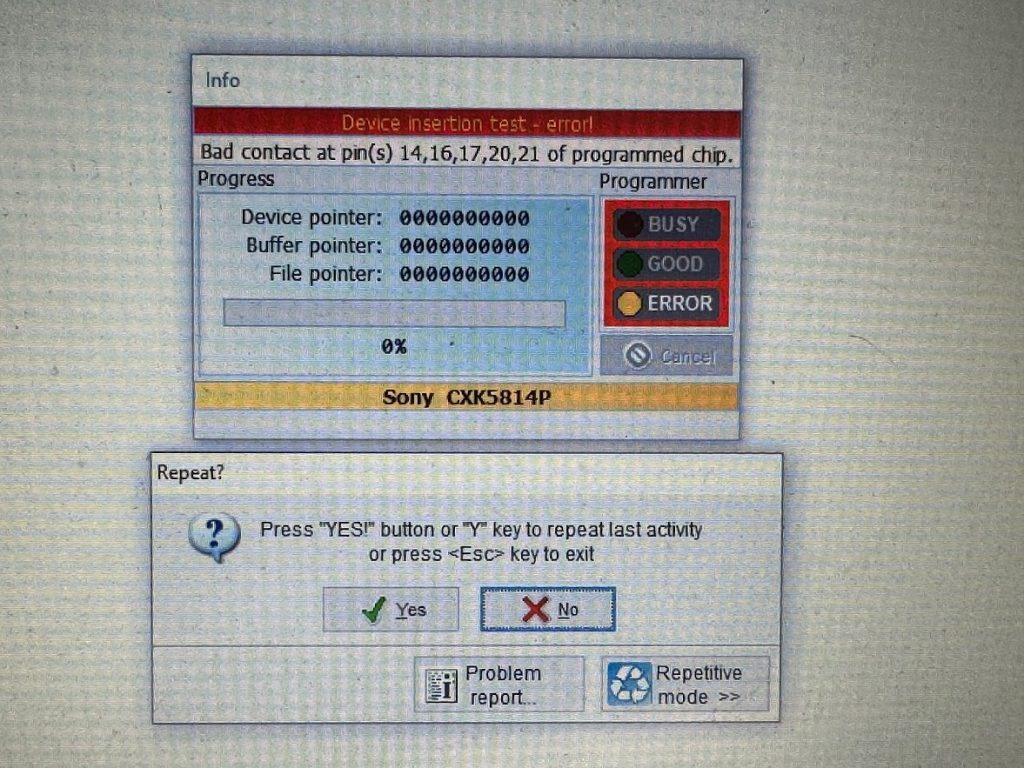
I had one exact part number replacement in my parts supply, so I replaced just the one bad Sony chip.
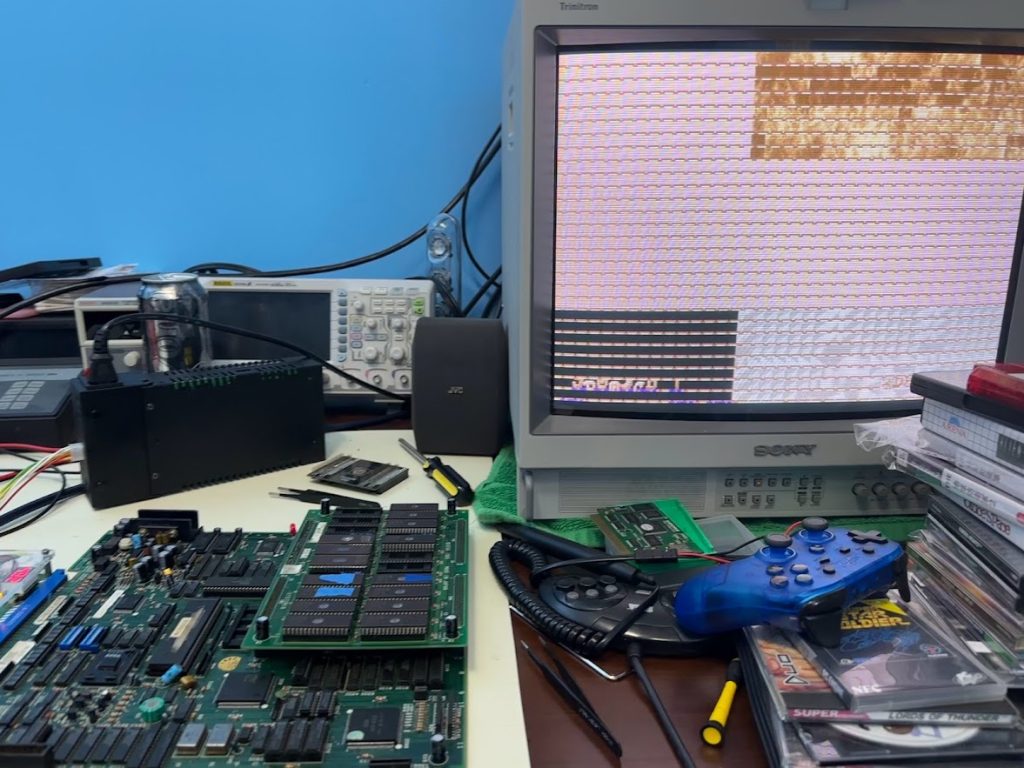
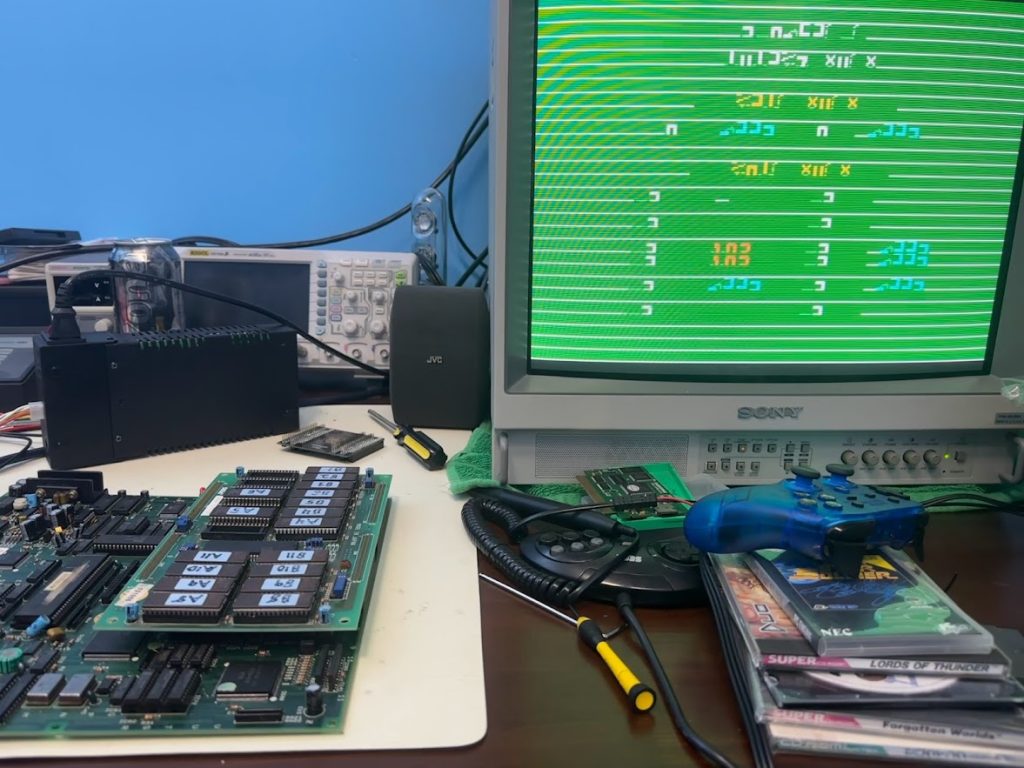
After all this RAM replacement, I figured it was time to power Moonwalker up again and see how things are looking. It’s not complete garbage graphics like it was before, but there’s still a fair bit of corruption.
Disappointingly, the self-diagnostics are still flunking in the same way as before as well – IC33 and 35 are flagged as Bad and it still freezes when scanning IC5.
Next, I decided to go around and check every socketed chip on the board I could find.
System 18 uses several GAL PLD (programmable logic devices) – thankfully they’ve all been dumped and are available to download on jammaarcade.net
https://wiki.pldarchive.co.uk/index.php?title=Shadow_Dancer_(SEGA_System_18)
There are 2 oscillator and 3 oscillator variants of System 18 and the GALs are different between them. The project board is a 2 oscillator version while my personal board is a 3 oscillator version, so rather than swapping my GALs over, I programmed a fresh set and swapped them into the project board instead. Unfortunately, they made no difference whatsoever.
Next, I went around and pulled every socketed TTL logic chip and tested them. 3 of them tested out Bad and I installed replacements. Between the 7 RAM and 3 TTL chips, I’m up to 10 confirmed Bad chips so far!
This cleared up some of the graphical glitching, but the horizontal lines and tile corruption were still present, and the self-diagnostics still flagged IC33 and 35 as Bad. I moved on to checking the Address and Data lines on IC33 and 35.
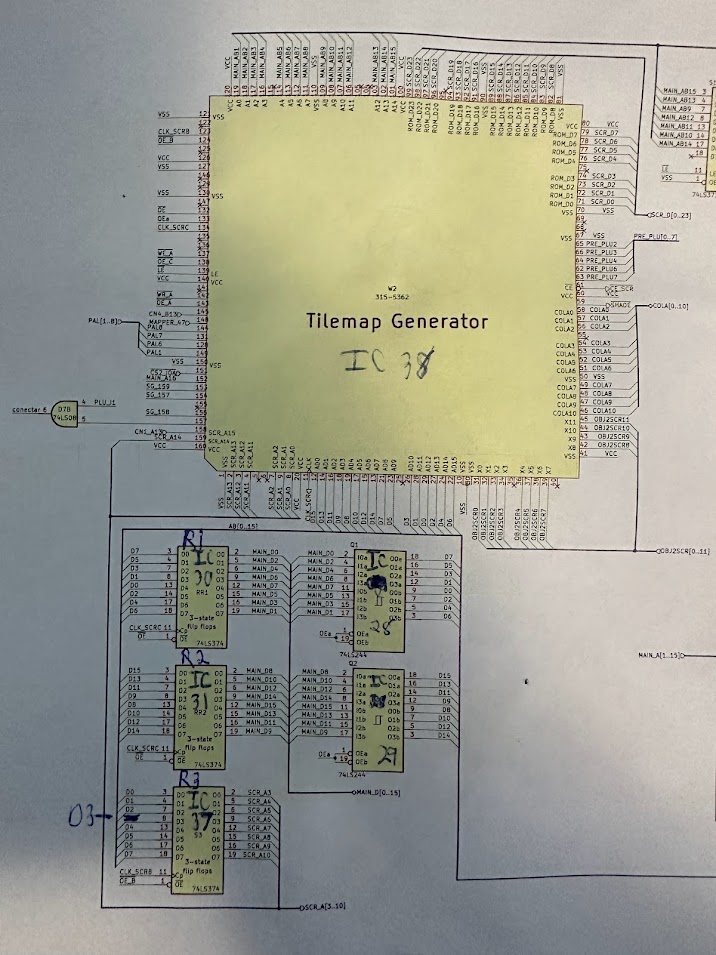
There is a large custom chip labeled 315-5362 in the upper-left corner of the System 18 board that’s responsible for driving all of the background tiling RAM chips in the upper-middle of the A board. Inspecting it under a microscope, I could see that it had been reflowed before, but several of the legs hadn’t been reflowed properly and had either lifted or slipped off their pads.
I used a needle to carefully move the shifted pins back onto their pads, reflowed all the legs on that side, then checked for continuity between the chip pins and pads. I excitedly fired up the game and ran the self-diagnostic. Now IC33 was passing the diagnostic, but IC35 still did not.
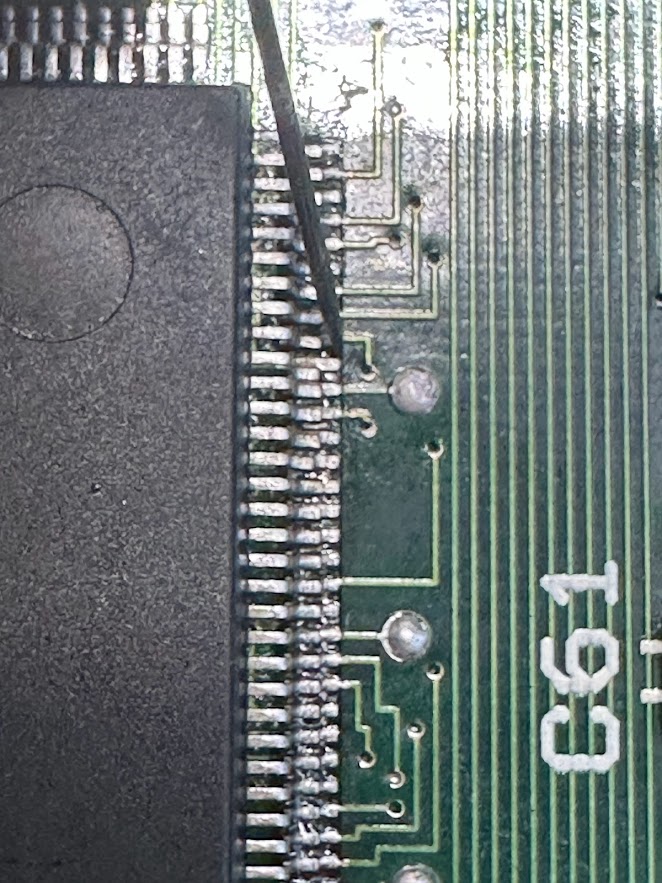
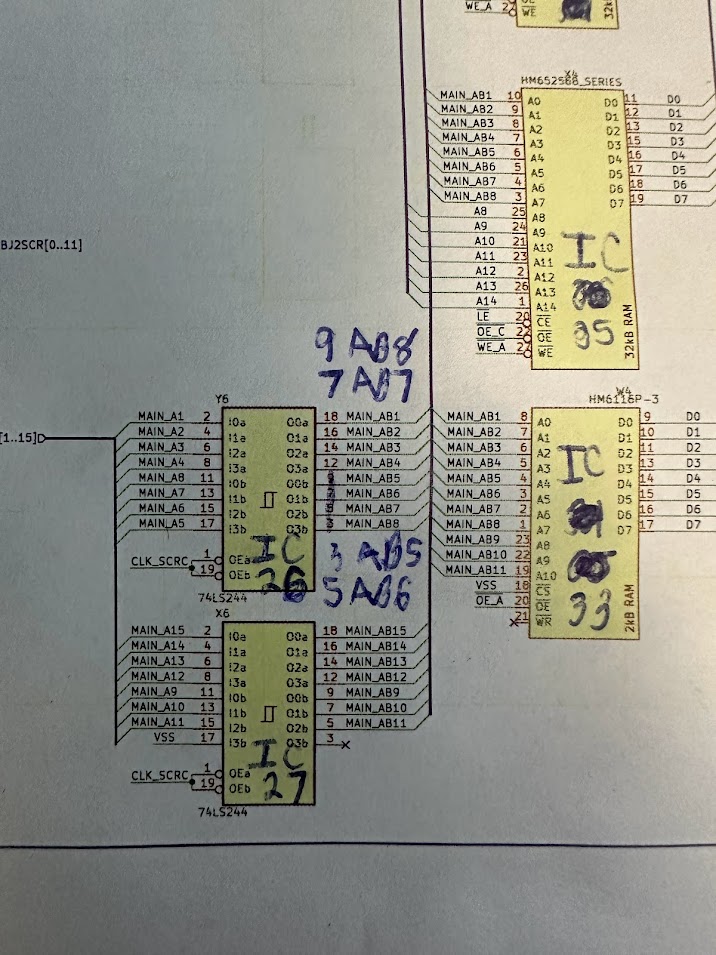
I next ran continuity testing and mapped out the destinations for the Address, Data, and Control lines for the IC35 and 36 pairing on my good System 18 board, then checked them on the project System 18 board. I’ll attach the mapping file below. The continuity testing revealed one broken line – Pin 19 on IC 35 is Data 8, but its connection to Pin 21 on the IC38 large custom was broken somewhere.
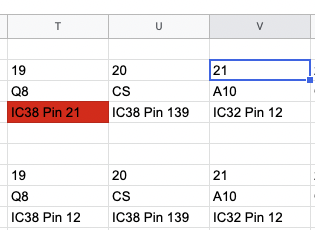
Rather than trace through the tangled web of vias and underside traces that connect all the SRAM lines to the custom, I opted to run a small patch wire directly from the custom’s pin to the corresponding pin on the SRAM socket. I like to use heavy-duty 3M tape to secure down patch wires since it’s easier than glue to remove later if need be.
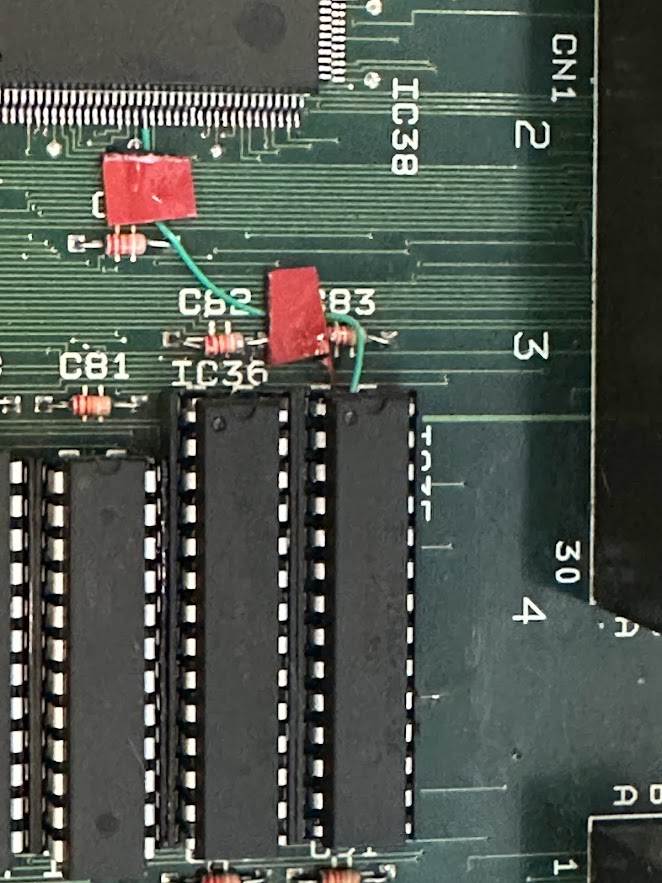
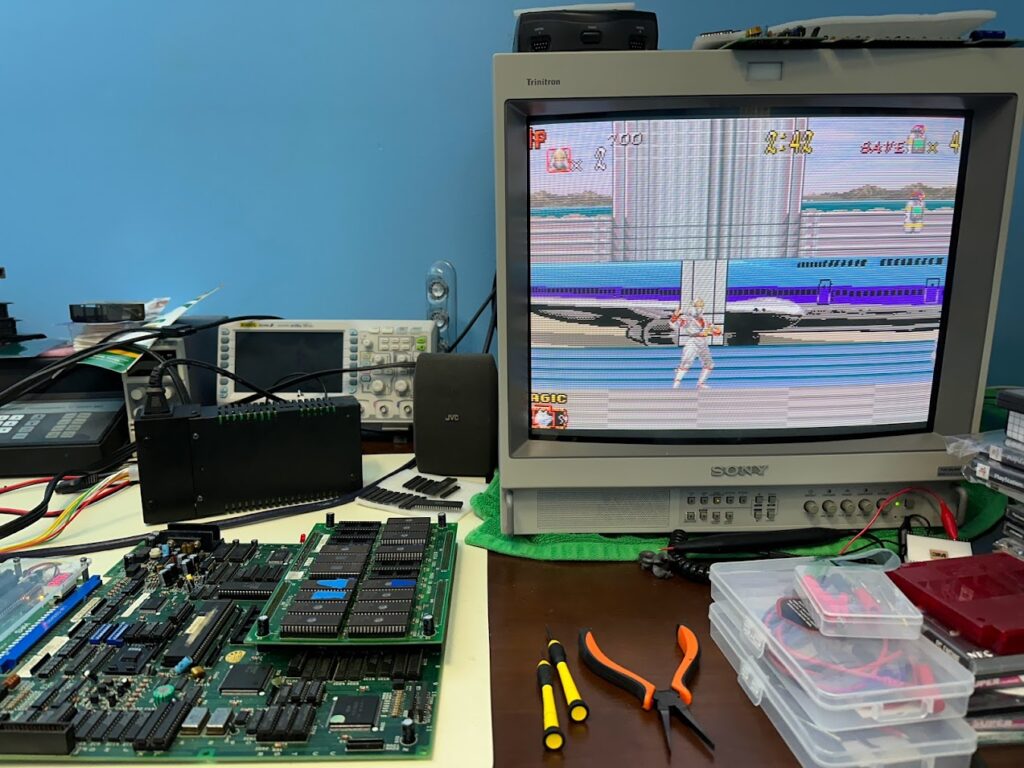
Finally all the lines on IC35 and 36 read good for continuity so I fired up the game again. And … it’s very close!
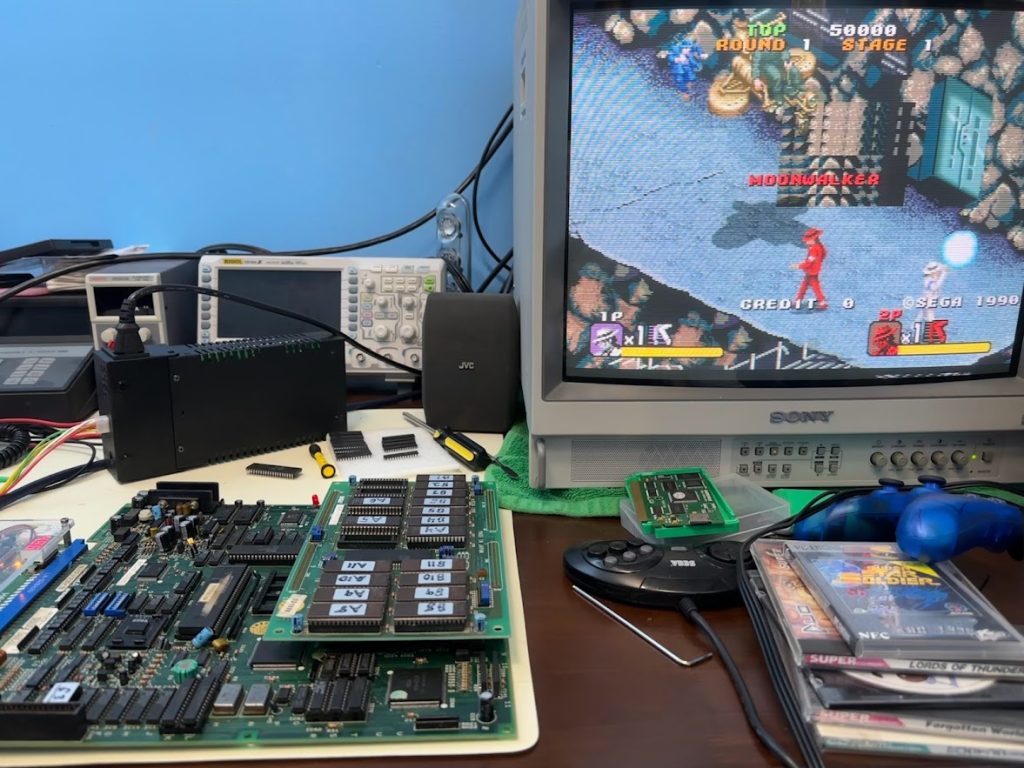
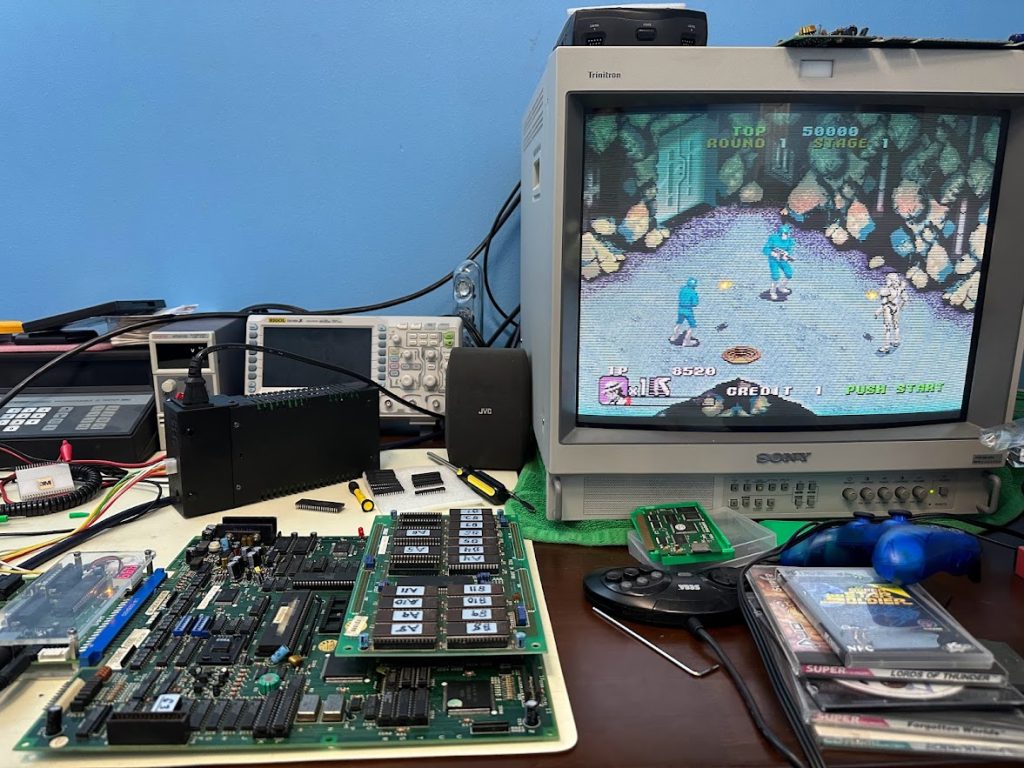
Corruption only appears occasionally – it seems to be happening for just one of the several tile banks.
The diagnostics pass now with flying colors as well, which is both good and bad. Now I won’t have any more help from the board on where to look for clearing up this last issue!

Looking again at the section of the PCB that renders the background tiles, nearly all the RAM and TTL chips had been socketed, checked and replaced if necessary – except for one:
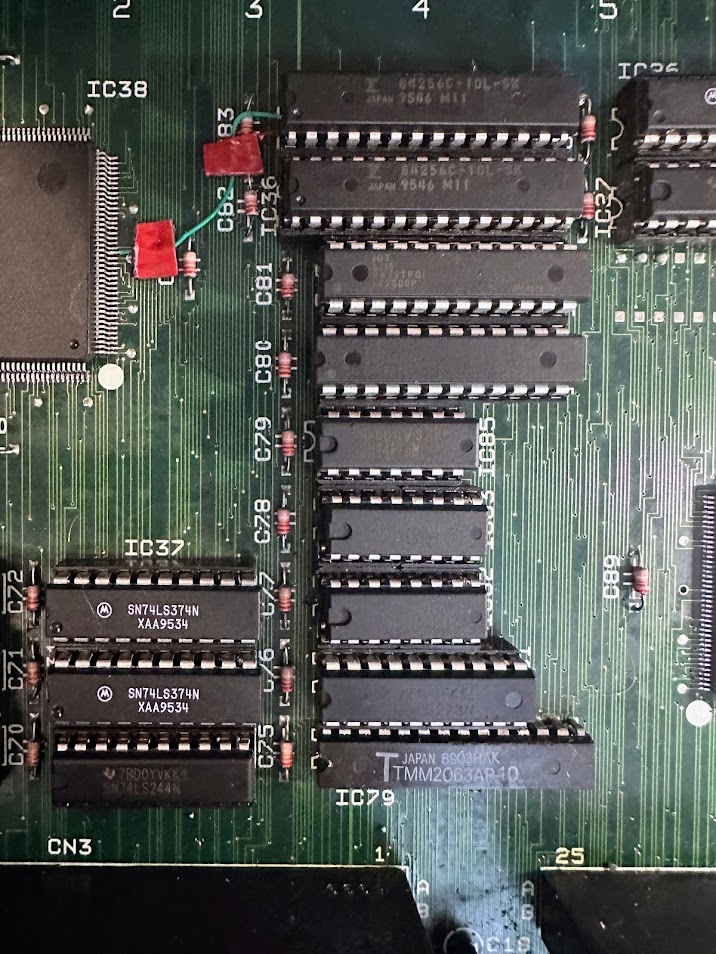
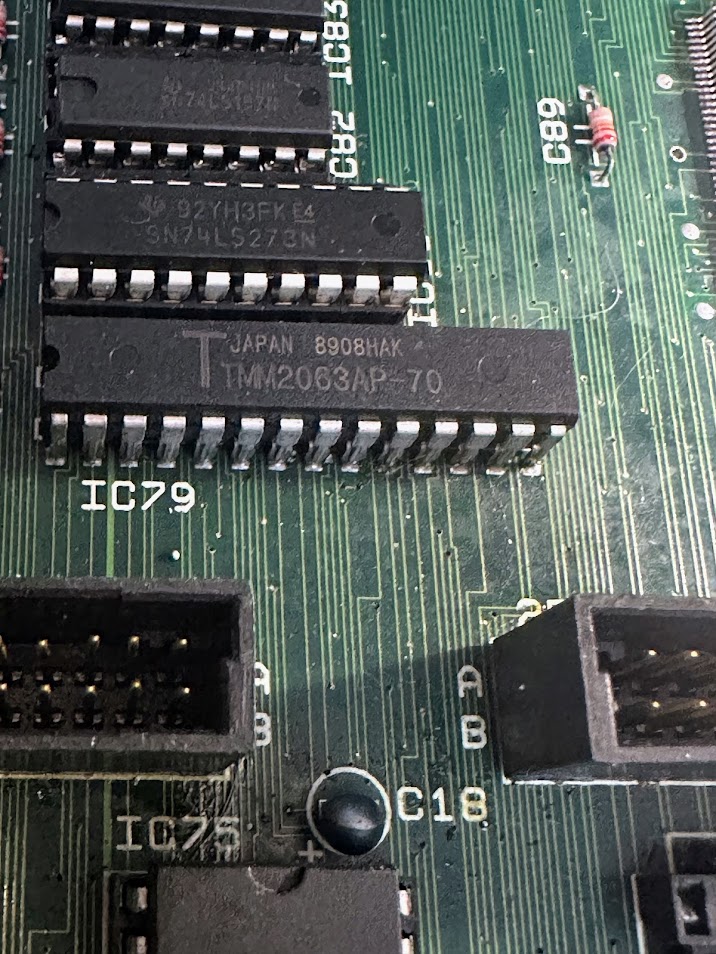
IC79, a TMM2063 SRAM chip, hadn’t yet been touched and the board’s self-diagnostic doesn’t look at it. As a quick test, I piggybacked a tested-good replacement chip on top of it to see if the board’s behavior changed – unfortunately it did not, so I’ll tentatively consider this RAM chip “good” for now.
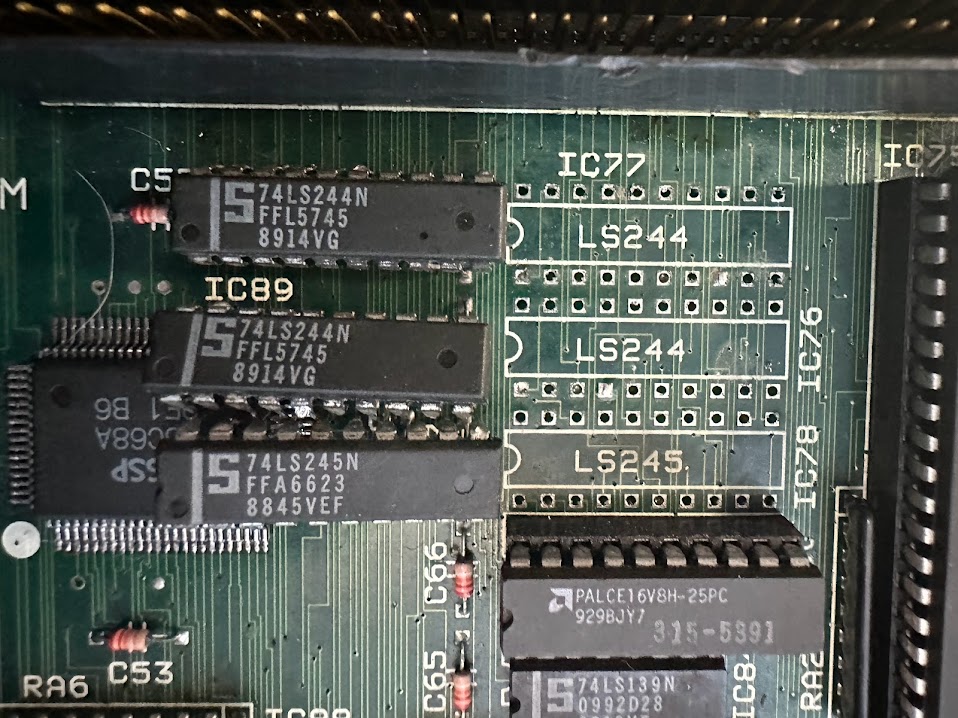
Next, I fired up the multimeter again set to continuity test and traced out all the lines that drive this RAM chip to their destinations. Surprisingly, the chip is driven by a variety of TTL chips and a PAL located underneath the ROM board connector adjacent to the Z80 Sound CPU and ASSP PCM sound generator – I had assumed that those TTL chips were all for the sound system given their location but apparently not!
Specifically:
IC76 = 74LS244 = Address Lines A0 – A7
IC77 = 74LS244 = Address Lines A8 – A12
IC78 = 74LS245 = Data Lines Q1 – Q8
IC80 = PAL = CS1
IC86 = 74LS32 = OE and WE

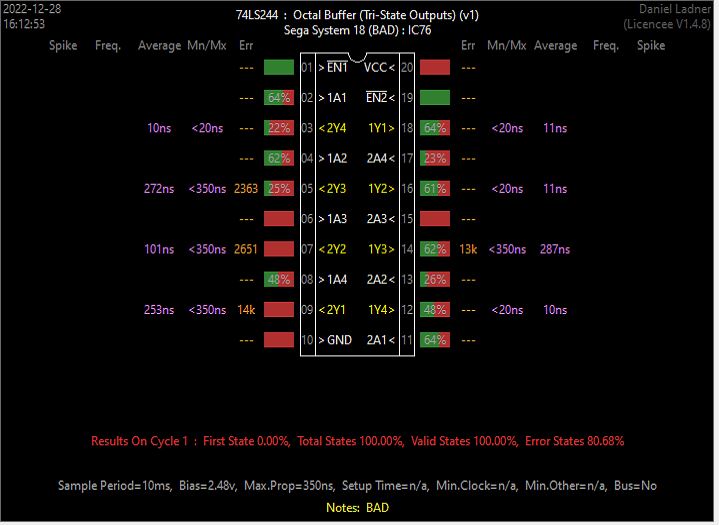
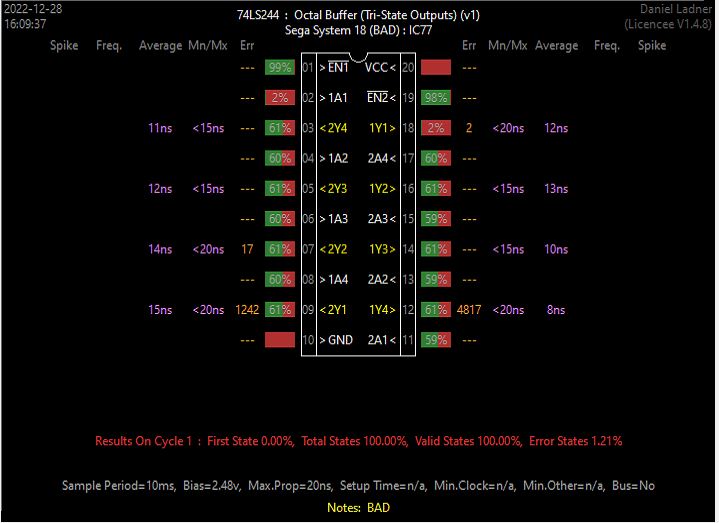
Testing these chips in-circuit was challenging given their close proximity both to each other and to the socketed PAL chip – there’s not much room to attach a test clip. That said, I was able to squeeze the clip on for IC76 and IC77 at least – and SLICE flagged both of them as malfunctioning.
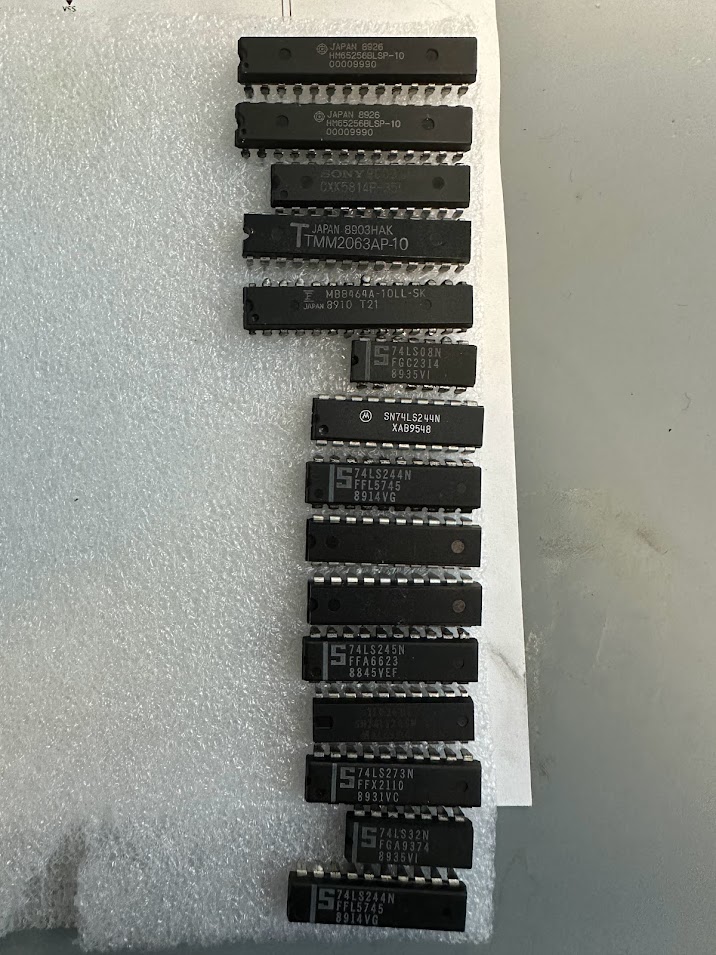
I went ahead and desoldered both of them from the board, and pulled IC78 too while I was at it.
All three (!) of these TTLs tested bad out of circuit on one chip tester, and just to be certain, I ran all three through a second tester which flunked them all as well.
I installed sockets and replacement 74LS244 TTLs to arrive, but unfortunately the background tiles still glitch occasionally just like before. Further research from other repair logs indicated that the IC79 RAM and supporting TTLs are indeed for the sound system and not for background tile rendering: https://forums.arcade-museum.com/threads/moonwalker-help.427895/
How odd that three TTLs flagged Bad then since the sound seemed to be working fine on the board all along…
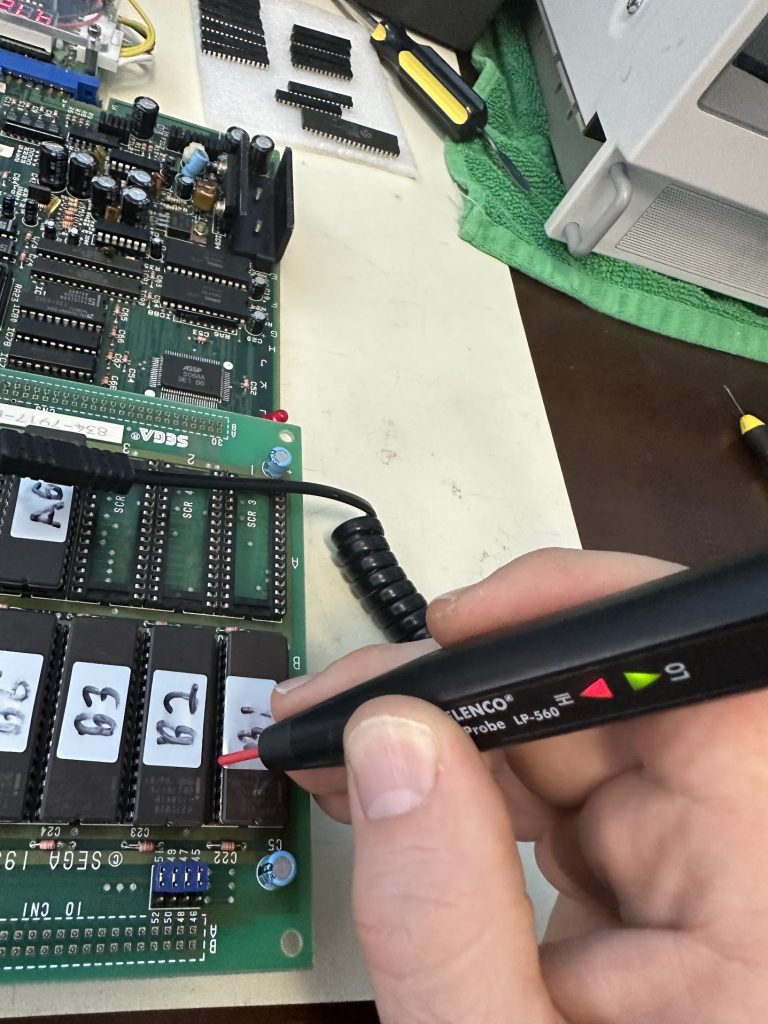
I next had the idea to logic probe the three background tile EPROMs on both the malfunctioning board and my working System 18 board to see if any of the three EPROMs showed a “stuck” Address or Data line, or if I could see any other behavior differences between the two boards. If there was a line that acted differently then I could trace it to the destination and focus on that culprit. No luck though – all of the lines showed the same activity on both boards for all three EPROMs as far as I could tell.
Next, I’ll trace out the connections on the TTLs in the tile rendering area and see what I can find out with them. To be continued!
Continued…
I found out that Jotego, one of the developers of FPGA recreations of arcade hardware, had recently generated and shared schematics of the System 18 board. Since no official Sega schematics have ever been publicly released, these new schematics are a substantial benefit to technicians of original hardware like myself.
Jotego’s System 18 schematics can be accessed here
I started continuity tracing through the tiling hardware, comparing against the schematics. In doing so, I discovered two places where the schematics were labeled incorrectly, so I let Jotego know.
Unfortunately, I wasn’t able to find any more broken or bridged traces using the schematic. There are several memory busses running to the Tiling Custom that need checking, but they run off the page of the schematic and I wasn’t able find the destination page where they map out to (the schematics are incomplete and still a work in progress by Jotego’s team).
At this point, I strongly suspect that the tiling custom itself has an internal failing of some kind, and that a replacement will need to be sourced from a parts donor. The owner of the board is a PCB repair technician as well and was anxious to get the board back so that he could continue working on it himself, so with his approval, I returned it to him with the tiling glitch still happening.
Still – I feel good about taking the board as far as I did – especially with diagnosing and replacing fifteen (!) failed chips!
End of repair.