Status: Paused as of 2/22/2022 but I’ll get back to it eventually. The ROM board suffers from several rotted traces and will need a bunch of patch wires.
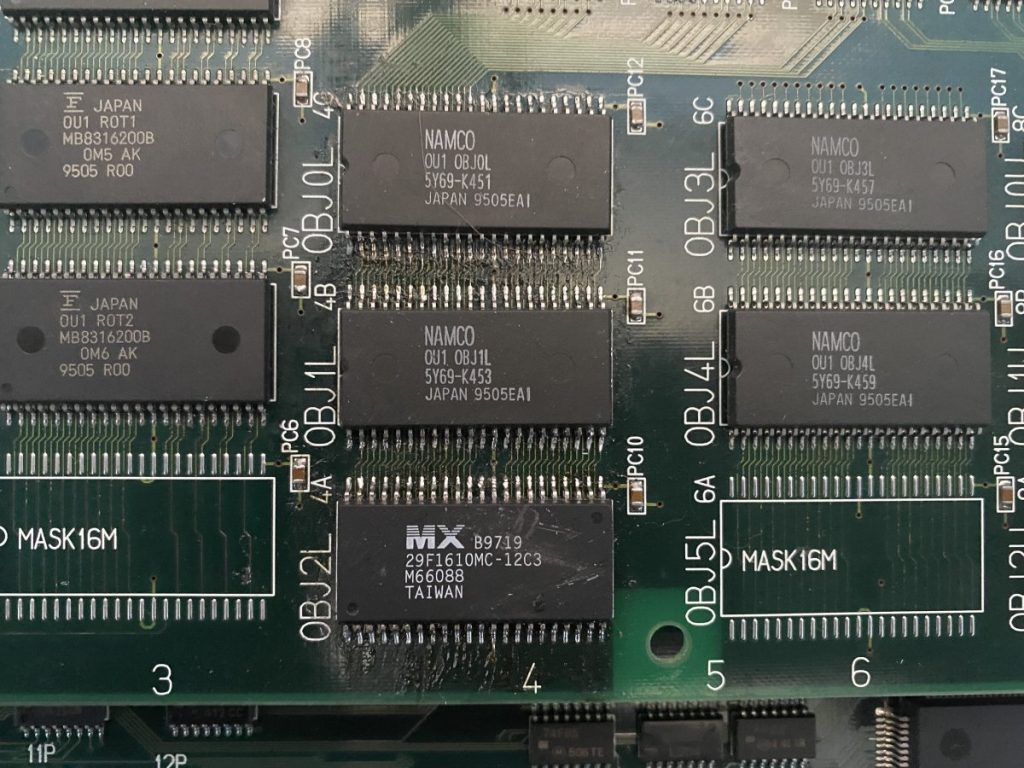
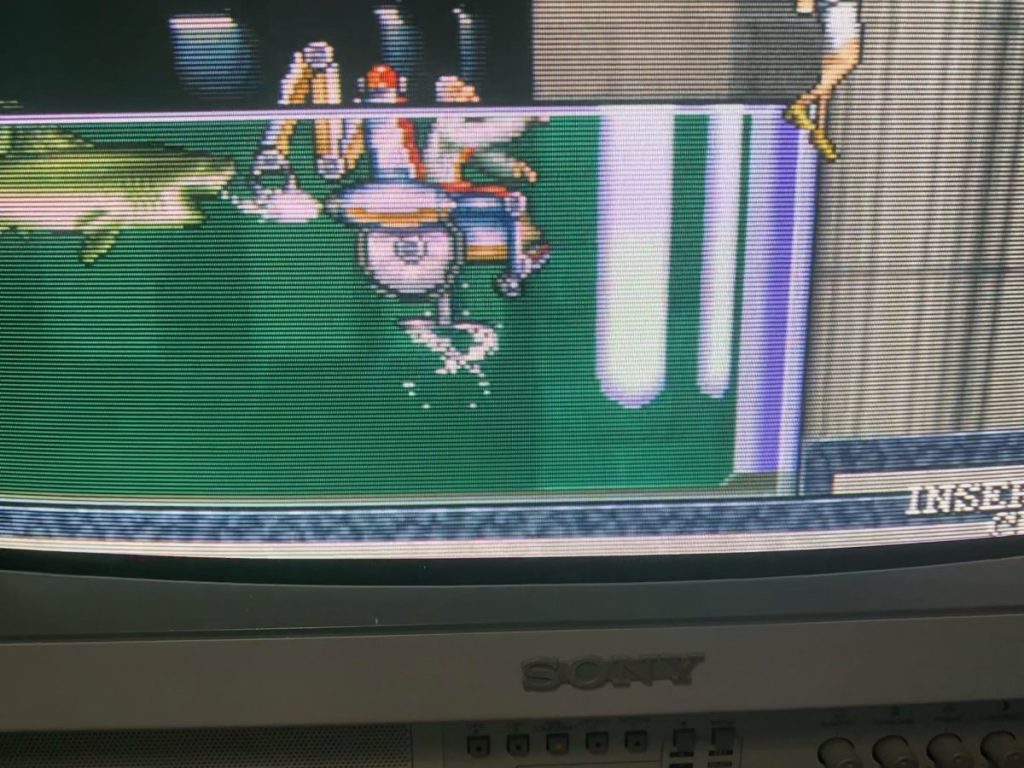
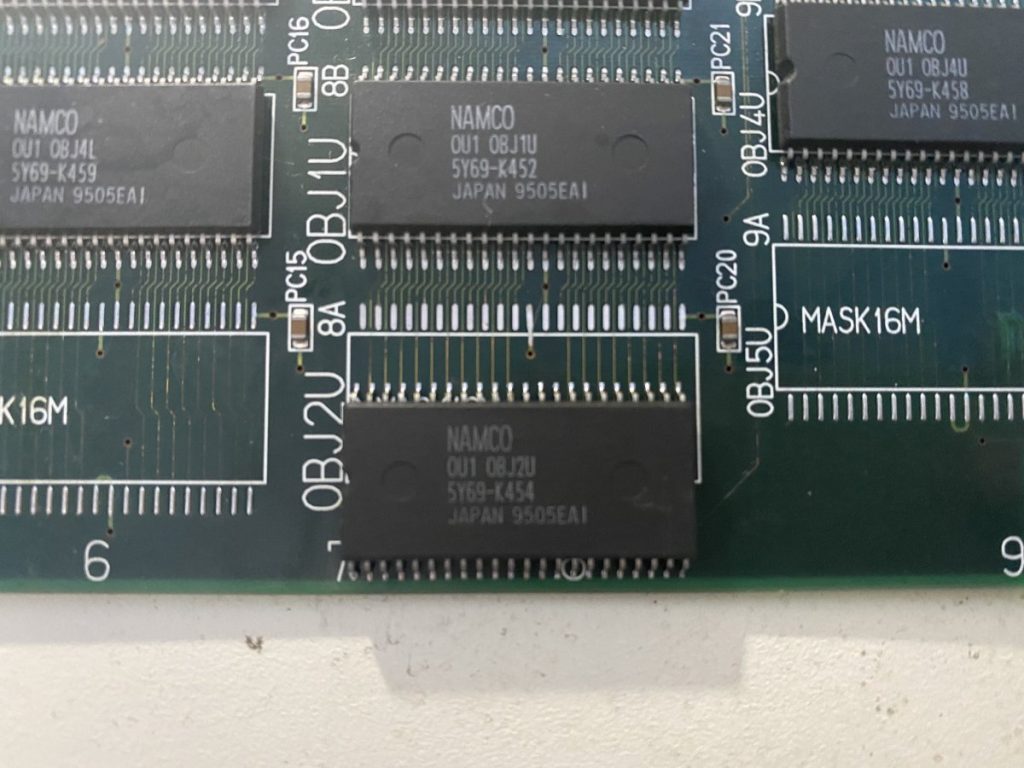
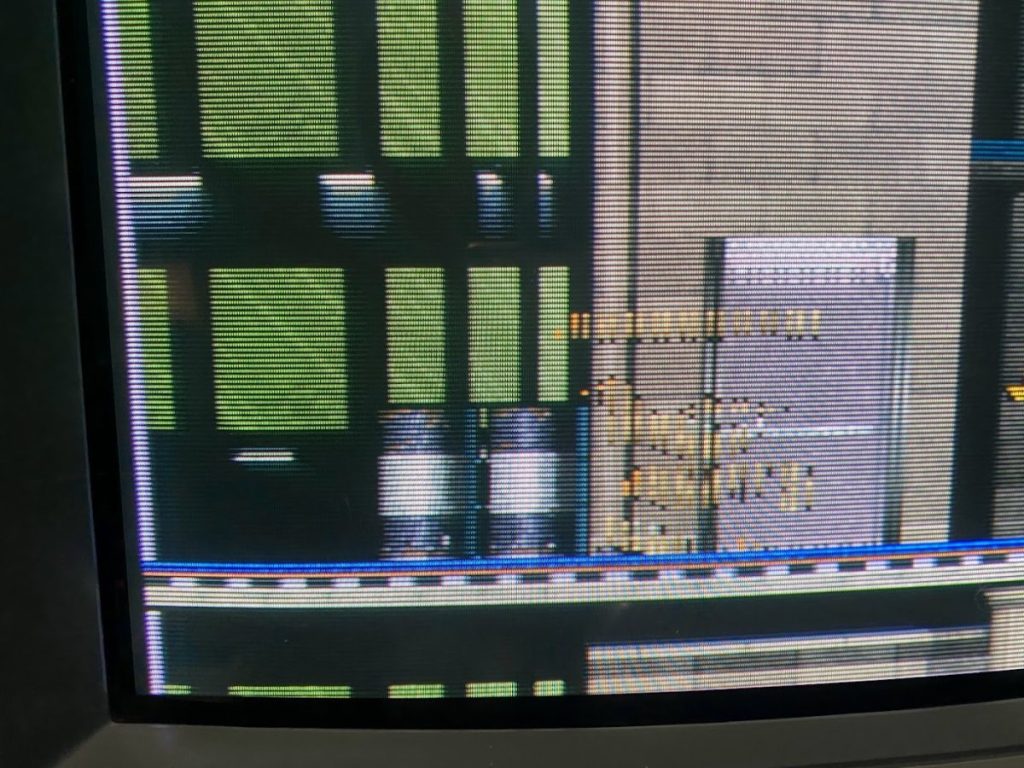
In for repair is a Namco Outfoxies PCB, running on Namco’s NB-2 platform. NB-2 has a large mainboard and a ROM daughterboard. The ROMs on the daughterboard are each 16 megabit SMD chips. The owner reported that the Professor character in the wheelchair displays jailbars.

While waiting for the board to arrive, I fired up MAME and deliberately zero’d out the OBJ ROMs one at a time until I isolated which ones duplicated the PCB’s behavior. OBJ2L and OBJ2U each provide half of the data for each Professor sprite frame. When either one of the files is corrupted then the character renders with jailbars. If both files are corrupted then the Professor isn’t drawn at all.
Once the PCB arrived, I examined the ROM board. It turns out that the Namco OG OBJ2L ROM had already been swapped out with a flash equivalent by another technician. That technician left a bunch of flux behind, and it looks like he also resoldered the OG Namco ROMs physically located above it while he was at it – likely from not masking off the other chips when applying heat to OBJ2L, causing the other chips to come loose as well.
I cleaned up the leftover flux with Q-Tips and isoproyl alcohol, then examined the solder joints of the three chips under the microscope. The solder joints checked out – I didn’t see any lifted pins. Continuity tests checked out for all of the pins as well. For good measure, I reflowed the solder on the OBJ2L flash ROM and re-tested the PCB, but the jailbars on the Professor remained.
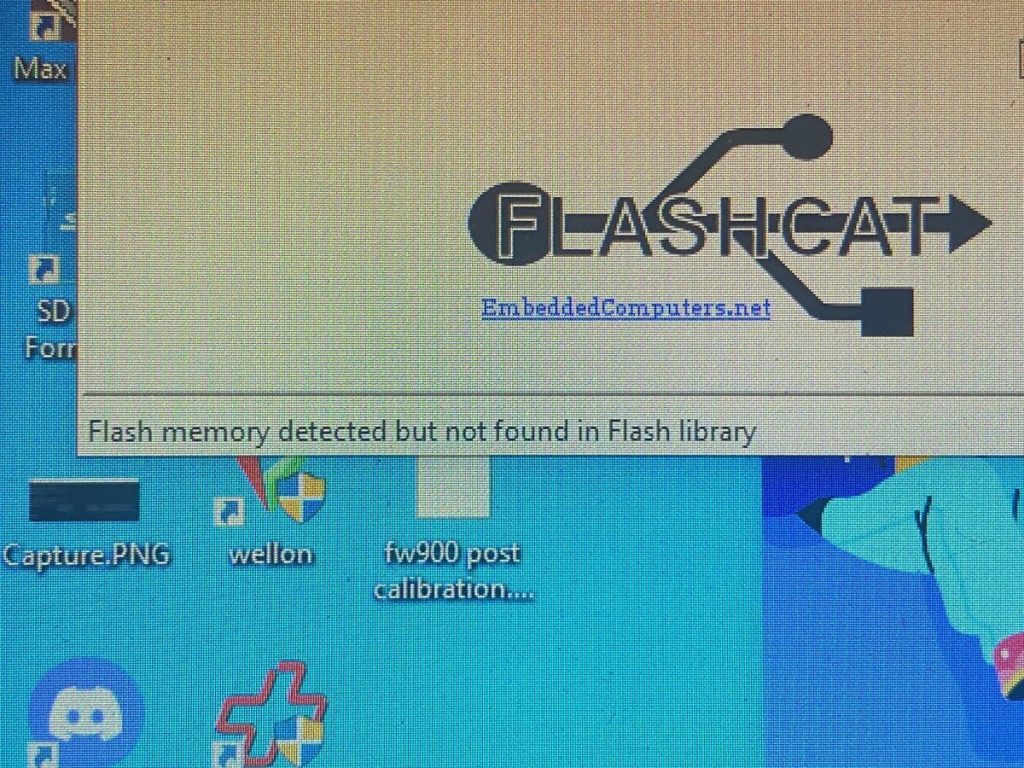
This is the point in the story where my chip programmer becomes a problem. I had been using an EETools ChipMax II for almost four years as my workhorse programmer, but it failed recently with a Pull Up Resistor error, and EETools refused to repair it outside of warranty. I had previously purchased an inexpensive Embedded Computers FlashCat-XPORT for SMD chip programming, so I tried to use it here. Unfortunately, the FlashCat turned out to be untrustworthy.
First off, the PCB owner included the original Namco OBJ2L ROM with the board – the prior technician had saved it after swapping it with the flash chip. I installed the ROM into the FlashCat and ran a comparison with the equivalent MAME file. The FlashCat reported that only 44% of the data on the ROM matched the MAME file, so it seemed that the ROM was indeed bad and that swapping it out had been the right move by the last technician.
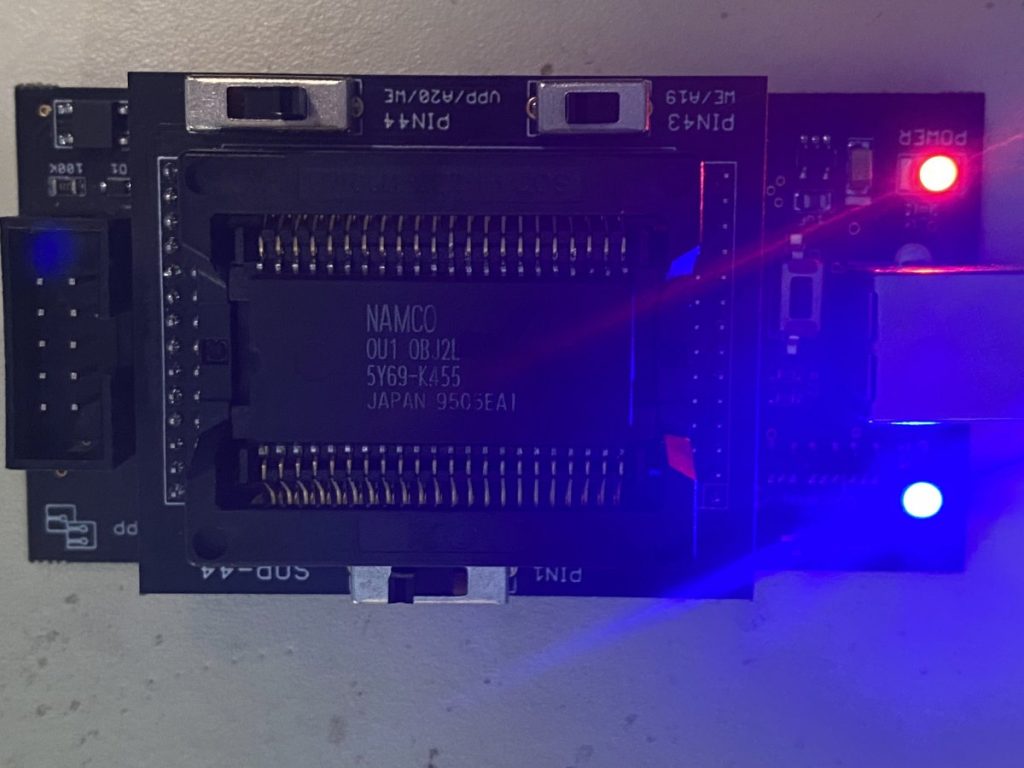

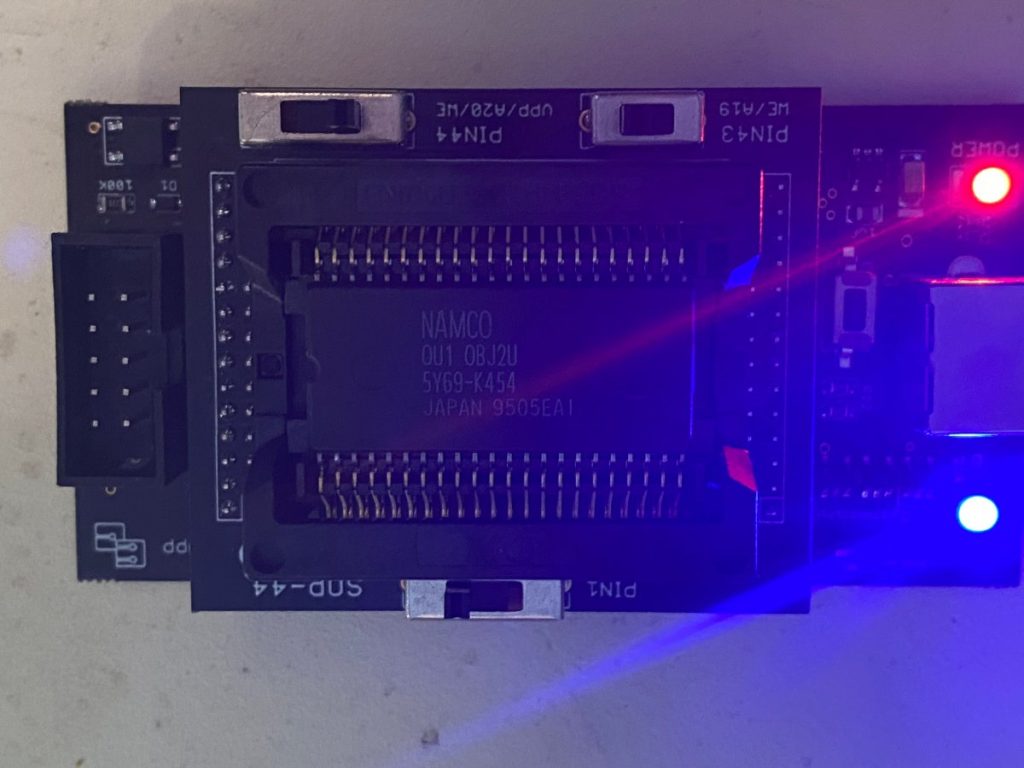
Next, I carefully desoldered the OBJ2L flash chip from the ROM board, inserted it into the FlashCat, and tried to run the same MAME file comparison. The FlashCat wouldn’t recognize the flash chip so that it could be dumped.
Alright, maybe the flash chip had gone bad then. I programmed a fresh flash chip, soldered it back to the ROM board and tested. Unfortunately, the jailbars on the Professor remained – BUT a few of his animations (like swimming) now showed up jailbar free.
That leaves the other ROM responsible for this character’s sprite graphics – OBJ2U – as a potential troublemaker. Maybe a second OG Namco ROM had failed?
I carefully masked off the chips around it and desoldered it from the board.
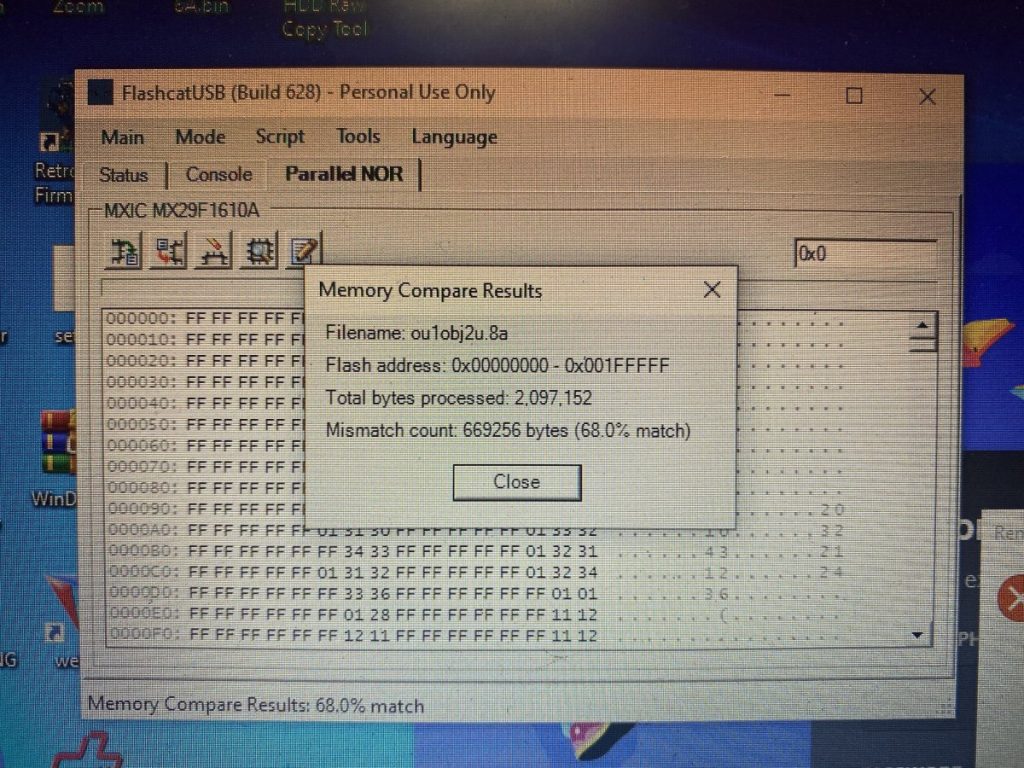
I then placed the mask ROM in the FlashCat and ran a comparison against the equivalent MAME file. It reported a 68% match – so apparently this ROM had also gone bad after all.
I programmed a fresh flash chip for OBJ2U, soldered it into place, and feeling confident – fired up the PCB for testing…..
Except to discover that now the Professor sprite isn’t rendering AT ALL! Not even with swimming, or any other activity.
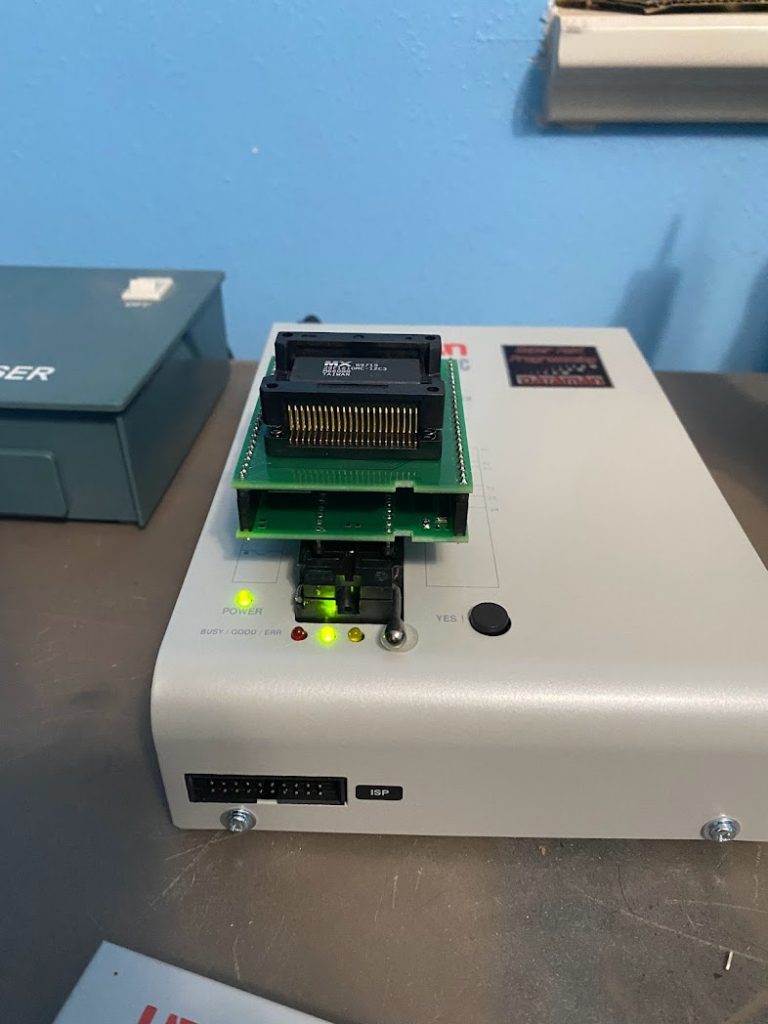
I swapped from using the Flashcat programmer to a Dataman 48ProC2. I dumped the two original Namco mask ROM chips again with the Dataman. The dumps from the Dataman and didn’t match the dumps from MAME either, so indeed both Namco chips are corrupt.
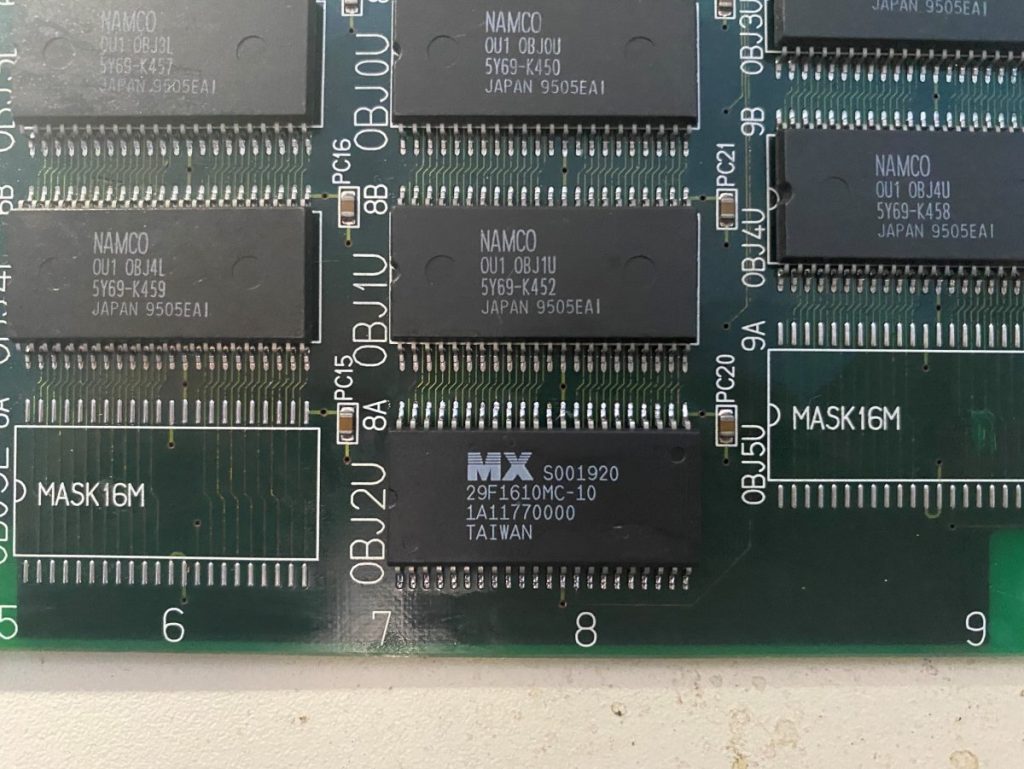
I programmed a fresh set of 29F1610 flash chips for OBJ2L and OBJ2U with my new chip programmer, and verified each chip three times before soldering them to the ROM board. I also reflowed the solder on the SMD mask ROMs physically located above OBJ2L and OBJ2U since they share address and data lines with the two chips I’m working on.
Unfortunately the Professor character is still showing up with jailbars in the game after installing the fresh chips.

I had been logging the repair on the Arcade Projects forum, and around this time JoyAgain and Caius let me know that a variant Outfoxies board had been discovered and had been dumped for MAME. The variant stores graphics in a different way than the set that was already in MAME, and as such the graphics ROMs on the new variant has checksums that are different than the prior MAME dump.
It turns out that this board runs the variant code – the checksum of the OBJ2U ROM chip from this board ended up matching the variant checksum for that chip. I had previously assumed OBJ2L was faulty because its checksum didn’t match the Outfoxies dump available in MAME at the time.
More information on the variant dump is here: https://www.arcade-projects.com/threads/in-progress-repair-log-outfoxies.18552/post-302128
I asked Caius for a copy of the full set of the variant ROMs, which he sent me at the beginning of December. The variant was also added officially to MAME on December 3:

First, just to be 100% sure before reinstalling anything, I dumped the original Namco OBJ2U chip several times and confirmed that the chip both dumped consistently and that its checksum matched the new MAME dump. It did, so I reinstalled it back on the ROM board.
Next, I dumped the original Namco OBJ2L chip several times, but the chip would not dump consistently and none of the dumps matched the new MAME dump. Thus, I set it aside, programmed a new flash chips with the OBJ2L code from the new MAME dump and reinstalled it back on the ROM board.
Crossing my fingers, I powered on the game and … the Professor character still had jailbars. So now it was time to break out the heavy-duty diagnostic equipment.
I have an HP Logic Analyzer that connects to all of the individual leads of a chip and will then monitor all of the communication activity. It’s time consuming to setup, so I only break it out in challenging situations like this one, but it’s very helpful for when you want to examine the behavior of multiple lines simultaneously.
I connected the LA up to both of the reinstalled chips one at a time and collected several traces of their activity.
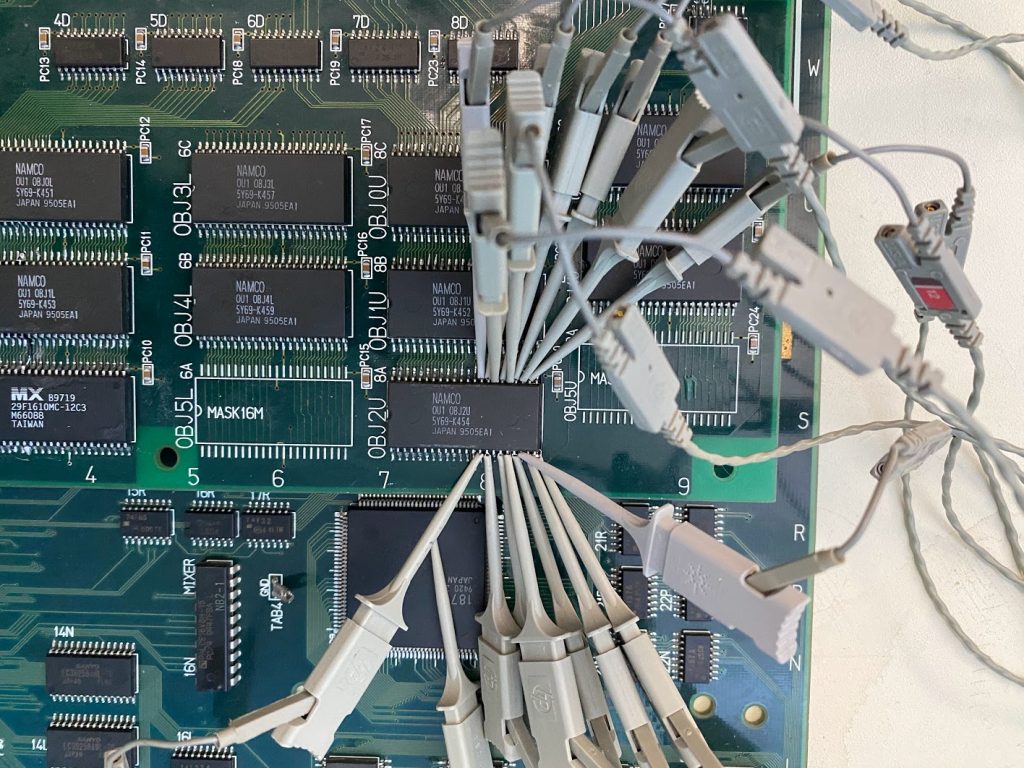
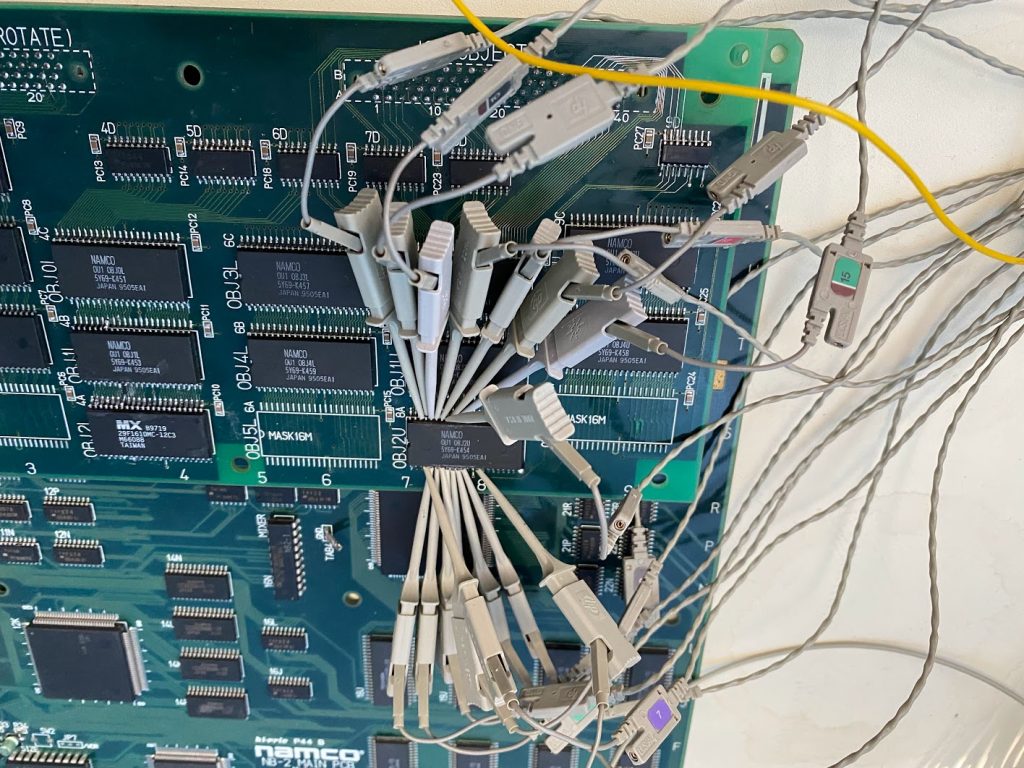
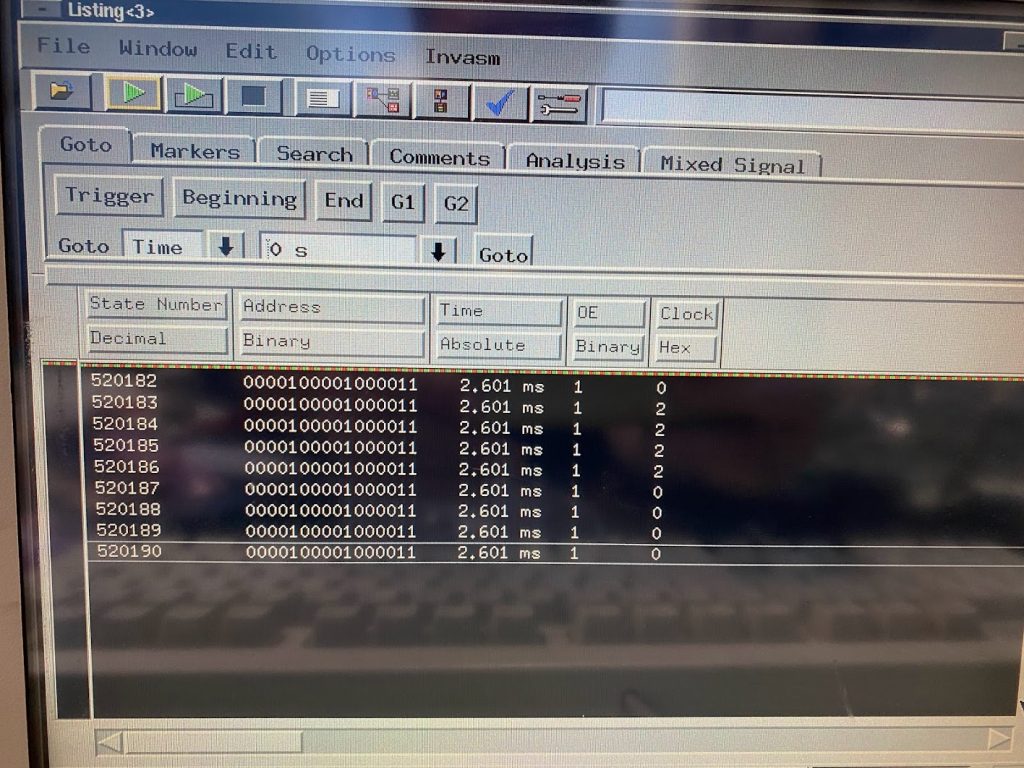
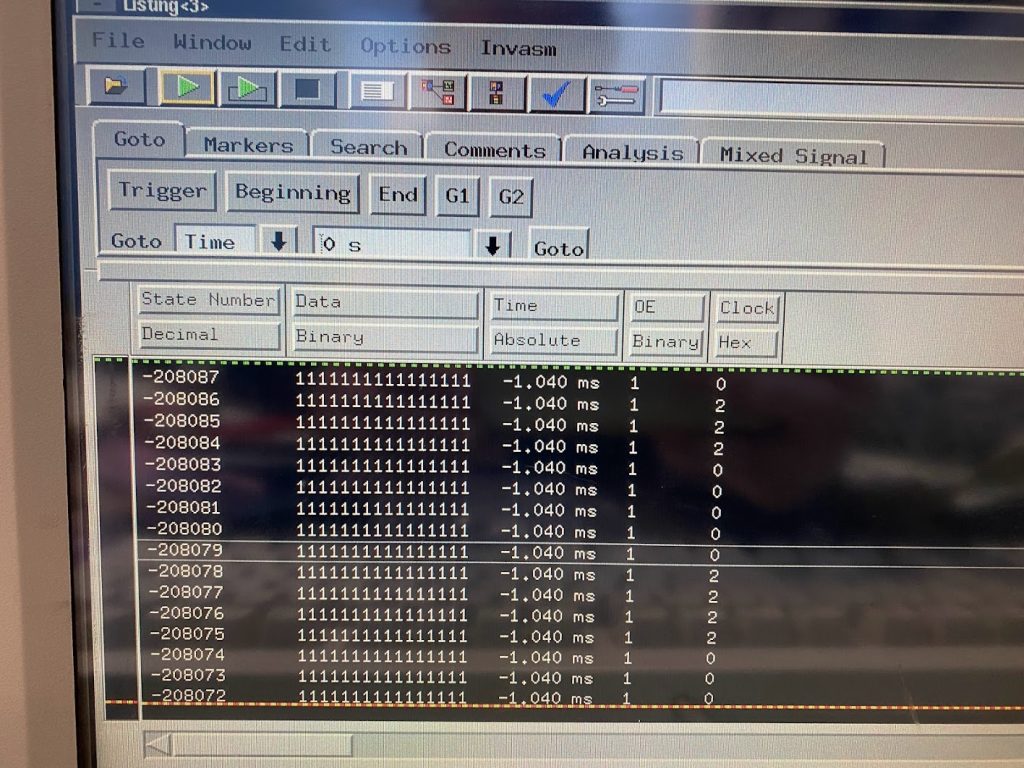
Surprisingly, the LA indicated that both chips are functioning properly – all of the lines are showing activity, and data is being accessed and read out of the chips. That meant that the problem apparently wasn’t faulty chips (as I’ve assumed all along given the symptoms) and was instead something else.
The jailbar behavior still indicates that one of the chips is completely dead. If the chip was functional but reading out garbled data then there would be vertical strips of garbage showing on the Professor character rather than no graphical data at all. But the LA shows that both chips are being accessed and are reading out graphical data properly, so something is happening to the data before it gets to the sprite rendering chip on the main board.
My assumption is that one or more of the connection lines for one of the chips could be weak – perhaps from the trace rust I saw in the corner of the board before – in such a way that the data is being read out from the chips but then lost before it reaches the bottom board. Using continuity tests, I produced a spreadsheet showing where each line on the two ROMs lead.
My spreadsheet showed that the EPROM Address lines lead to five TTL logic chips on the ROM board (located at 4D – 8D) that handle memory addressing on behalf of the bottom board. Data lines run directly to the bottom board connector. The Output Enable (OE) Control lines are handled by a different 138 TTL logic chip located at 9D.
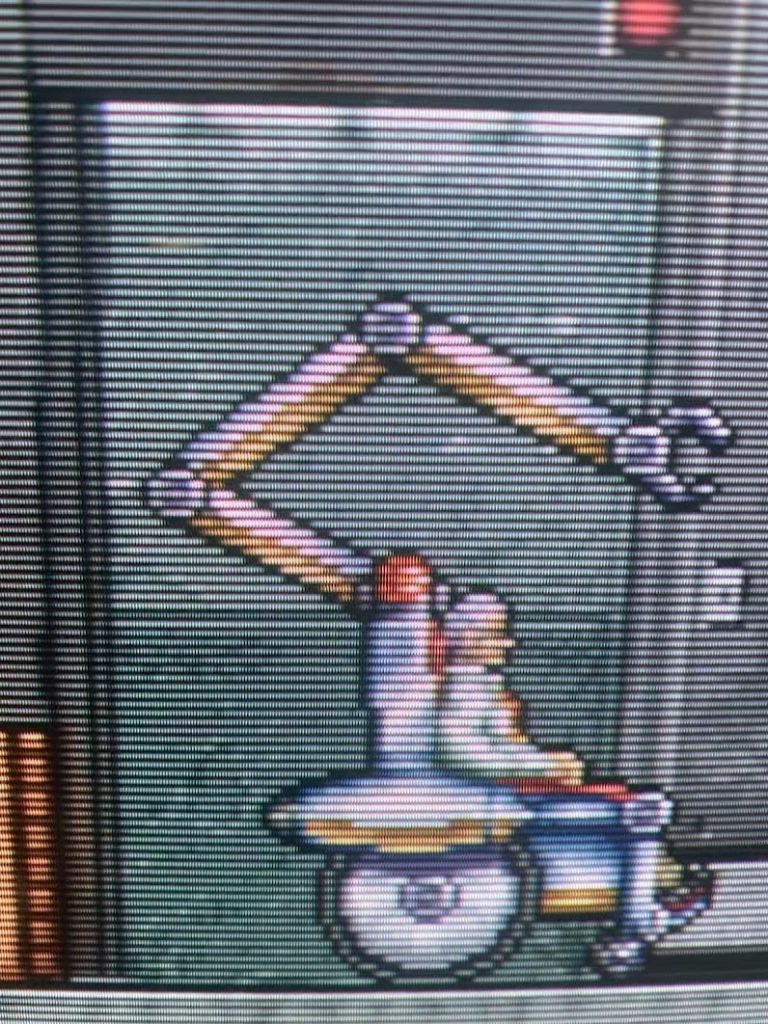
Given that the symptoms indicated that the flash chip wasn’t enabled properly, I used my oscilloscope to probe the lines of the 138 TTL logic chip at 9D that issues the OE signals. I found that the OE lines for the jailbarring chips looked weak – the signal normally runs High, but pulls Low to ground when the output is enabled. You can see in this scope photo that the signals going Low don’t go Low very far – they should be pulled down to the bottom of the screen.

I ordered a replacement 74F138 TTL logic chip, removed the old one and installed the new one. I checked the output lines again with the new chip and now the High signals get pulled strongly Low as they should (Photo 8).


I tested the game again and … still jailbars on the Professor character.
I’ll admit I was a bit stumped at this point. Everything seems to check out as it should. The chips have the correct code, they’re being accessed and read, and their Output Enable signals are now strong. On a hunch, I tried physical manipulation – gently wiggling the ROM board with the game running and physically pressing down at different spots on the ROM board. To my surprise, I found that if I pressed down firmly on the flash ROM chip then the jailbars would go away and the Professor would render correctly.
Typically with an SMD chip this would indicate a loose connection from a soldering problem, so I carefully reflowed each joint on the flash ROM under the microscope and added extra solder for good measure. It didn’t make any difference – the jailbars would remain on the Professor but would go away if I applied thumb pressure to the chip.
I’ve concluded that there must be rust damage to the traces in such a way that is causing the flash ROM signals to degrade – but not degrade enough so that the traces show up as disconnected on the continuity tests or logic analyzer. Honestly, this is very strange – I haven’t encountered behavior like this on any of my arcade board repairs before. Usually, a faulty trace is very obvious to these tools.
I believe the next step will be to run reinforcement wires to the flash chip. It likely only needs a few of them to resolve the jailbar issue, but I may run lines for all of them just to ensure the long-term reliability of the game.